Not every customer books online—and with Xola, that’s no problem. Whether someone calls to make a reservation over the phone or walks in without a prior booking, Xola gives you the flexibility to capture the sale instantly. This is especially helpful for busy front desks, concierge teams, or mobile staff who need to create reservations quickly and on the fly.
Using Xola’s Back Office Purchase tools, you can initiate a new reservation directly from the Dashboard or the Purchases tab. From there, you’ll walk through a streamlined booking flow where you can select the appropriate product, choose the correct event time, and input the guest’s name, contact details, and any relevant notes or tags. You also have the ability to add upsells, apply discount or agent codes, or enter custom charges depending on your guest’s needs.
Once all the booking details are set, you can complete the purchase by processing a payment using one of the many supported payment methods, including credit card, cash, check, invoice, or store credit—whatever your business accepts. Everything is handled within one smooth transaction flow, with all reservation details logged in Xola automatically for tracking, reporting, and follow-up.
This back-office workflow ensures that whether it’s a last-minute walk-in or a phone reservation, your team is fully equipped to say “yes” to every guest, every time, without missing a beat. The steps below will guide you through completing a back-office purchase and collecting payment efficiently using your Xola account.
User Access: Administrator, Reservationist Lite or Reservationist roles have access to make a purchase through the back office.
To grant access to users, click here.
What's covered in this article:
Purchase Using the Make a Purchase Button
From the Dashboard or Purchases tab, click the green Purchase button and choose a product. A product can be an Experience, Package, Membership, Gift, Partner Experience, or Partner Package. Below are the details for making a purchase of an Experience. Please use the links above to see the purchase details for other types of Products.
Tip: If you are using Partners, you will be able to see the name of the Partner in the experience when you are making a purchase in the Back Office. 
Product Details
Once you select the product the customer wants to purchase, you'll be directed to the Product Details page, where you can enter the following:
- Privacy Settings: Choose whether the reservation is public or private if it is an experience with public and private options. If you do not have this option, the reservation will default to its privacy settings.
- Guest Quantity: Choose the number of guests attending the experience. If you have different demographic types, you can enter the number for each demographic.
- Date and Time: Choose the date and time in which the guests are coming for the experience.
- When choosing a new timeslot, you can also:
- Choose a date in the past by toggling on Show Past Availability.
- Choose a date outside your future cutoff by toggling on Show Future Dates Past Cutoff.
- When choosing a new timeslot, you can also:
- Add a Timeslot: If you need to add a timeslot, you can click on the '+add a time' button. To learn more about this feature, click here.
Purchase Modifications
After you have filled out the product details, you can choose to modify the purchase by choosing:
- Add-ons: Choose which add-ons you would like to add to the reservation if you have add-ons set up.
- Custom Line Items: Toggle on and click the '+line item,' and you can create on-the-fly discounts or charges, which can be taxed if needed.
- Taxes and Fees: Click on the
 icon under the Payment Summary on the right-hand side to remove any taxes or fees you have set up under Settings.
You can not remove Xola's Service fee.
- Codes: Add a coupon or agent code by locating the code field under the purchase summary on the right. Click on the dropdown or enter the code you would like to use. Select the code you would like to use and click Apply.

Customer Details
Now you can enter the Organizer Details:
Tip: If you want to look up a past guest to book, click on the Search Customer button next to the Guest name to search for your guests. This will automatically populate the guest's name, email, and phone number. It will also automatically fill in credit card details if they have previously used a credit card.
- Customer Name
- Customer Email
- Customer Phone
- Organizer is attending:
- Toggled on: This means the organizer is attending, and the main attendee in the section below will default to the organizer's name.
- Toggled off: This means the organizer is not attending. In the next section, you can fill out the name of the main attendee so that your staff knows who will be attending the experience.
After this, you can fill out the Attendee Info:
The attendee info section will help your staff know who is coming for the experience, here you can:
- Fill out the name of each guest attending
- If using our waiver feature, as guests fill out the waivers, the names will automatically populate into this section on the Purchases Tab.
- The questionnaire answers if you are using this feature.
- If it is a per-person questionnaire, you can click on the
 icon next to each guest and fill out the questionnaire for each attendee.
 - If it is per reservation, you can click on theicon next to the main attendee and fill out the questionnaire.
- If it is a per-person questionnaire, you can click on the
- If you want to skip this, you can toggle on the 'ignore questionnaire validation errors for now'

Payment Details
Next, choose your payment workflow:
- Now: Take immediate payment
- Later: This will reserve your customer's spot without collecting payment. When ready, you can find their purchase in the Purchases tab to collect the balance.
- Collect a Deposit
- Split Payment
If taking immediate payment, select the payment method:
- Credit Card
- Cash
- Check: If your customer is paying by check, we recommend noting the check number in the comment section.
- Invoice: This allows you to send your customer an Invoice for the purchase that can be paid at a different time.
- Other: This can be any third-party payment method your business accepts, like PayPal, Bitcoin, or Venmo. You can set these under Settings > Payments.
Pro Tip: Notice the Do not charge card now toggle under the payment method section. This will store your customer's card information but will not charge the customer. You can later go into the customer purchase to collect the balance.

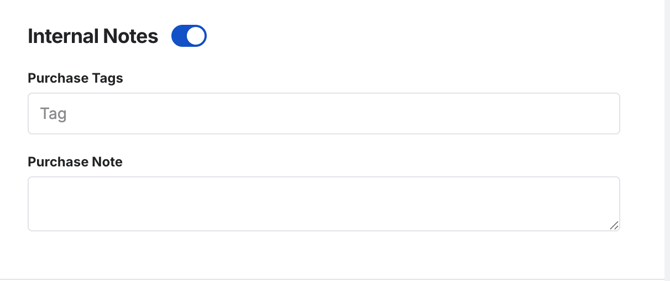
Internal Notes
Optionally add a Tag or internal note for your staff.
- Tag: A tag is a word or phrase added to a purchase that can be used for searching and filtering in the Purchases tab. When you type the tag into the search bar, it will bring up all purchases that have been tagged as such.
- Purchase Note: This will appear on the event's roster in the Purchase Notes section.
Add Another Product
If you need to add another experience to the same purchase, you can select the 'Add Another Product' button. The customer will receive separate confirmation emails for each separate experience reserved. This is to ensure you can make changes to one purchase without it affecting another.
To complete the purchase, click Pay.
- After accepting payment, depending on the Post-Booking Action Preferences configured in your Settings, you will be taken to the Purchases tab page, to your Dashboard, or to make another purchase.
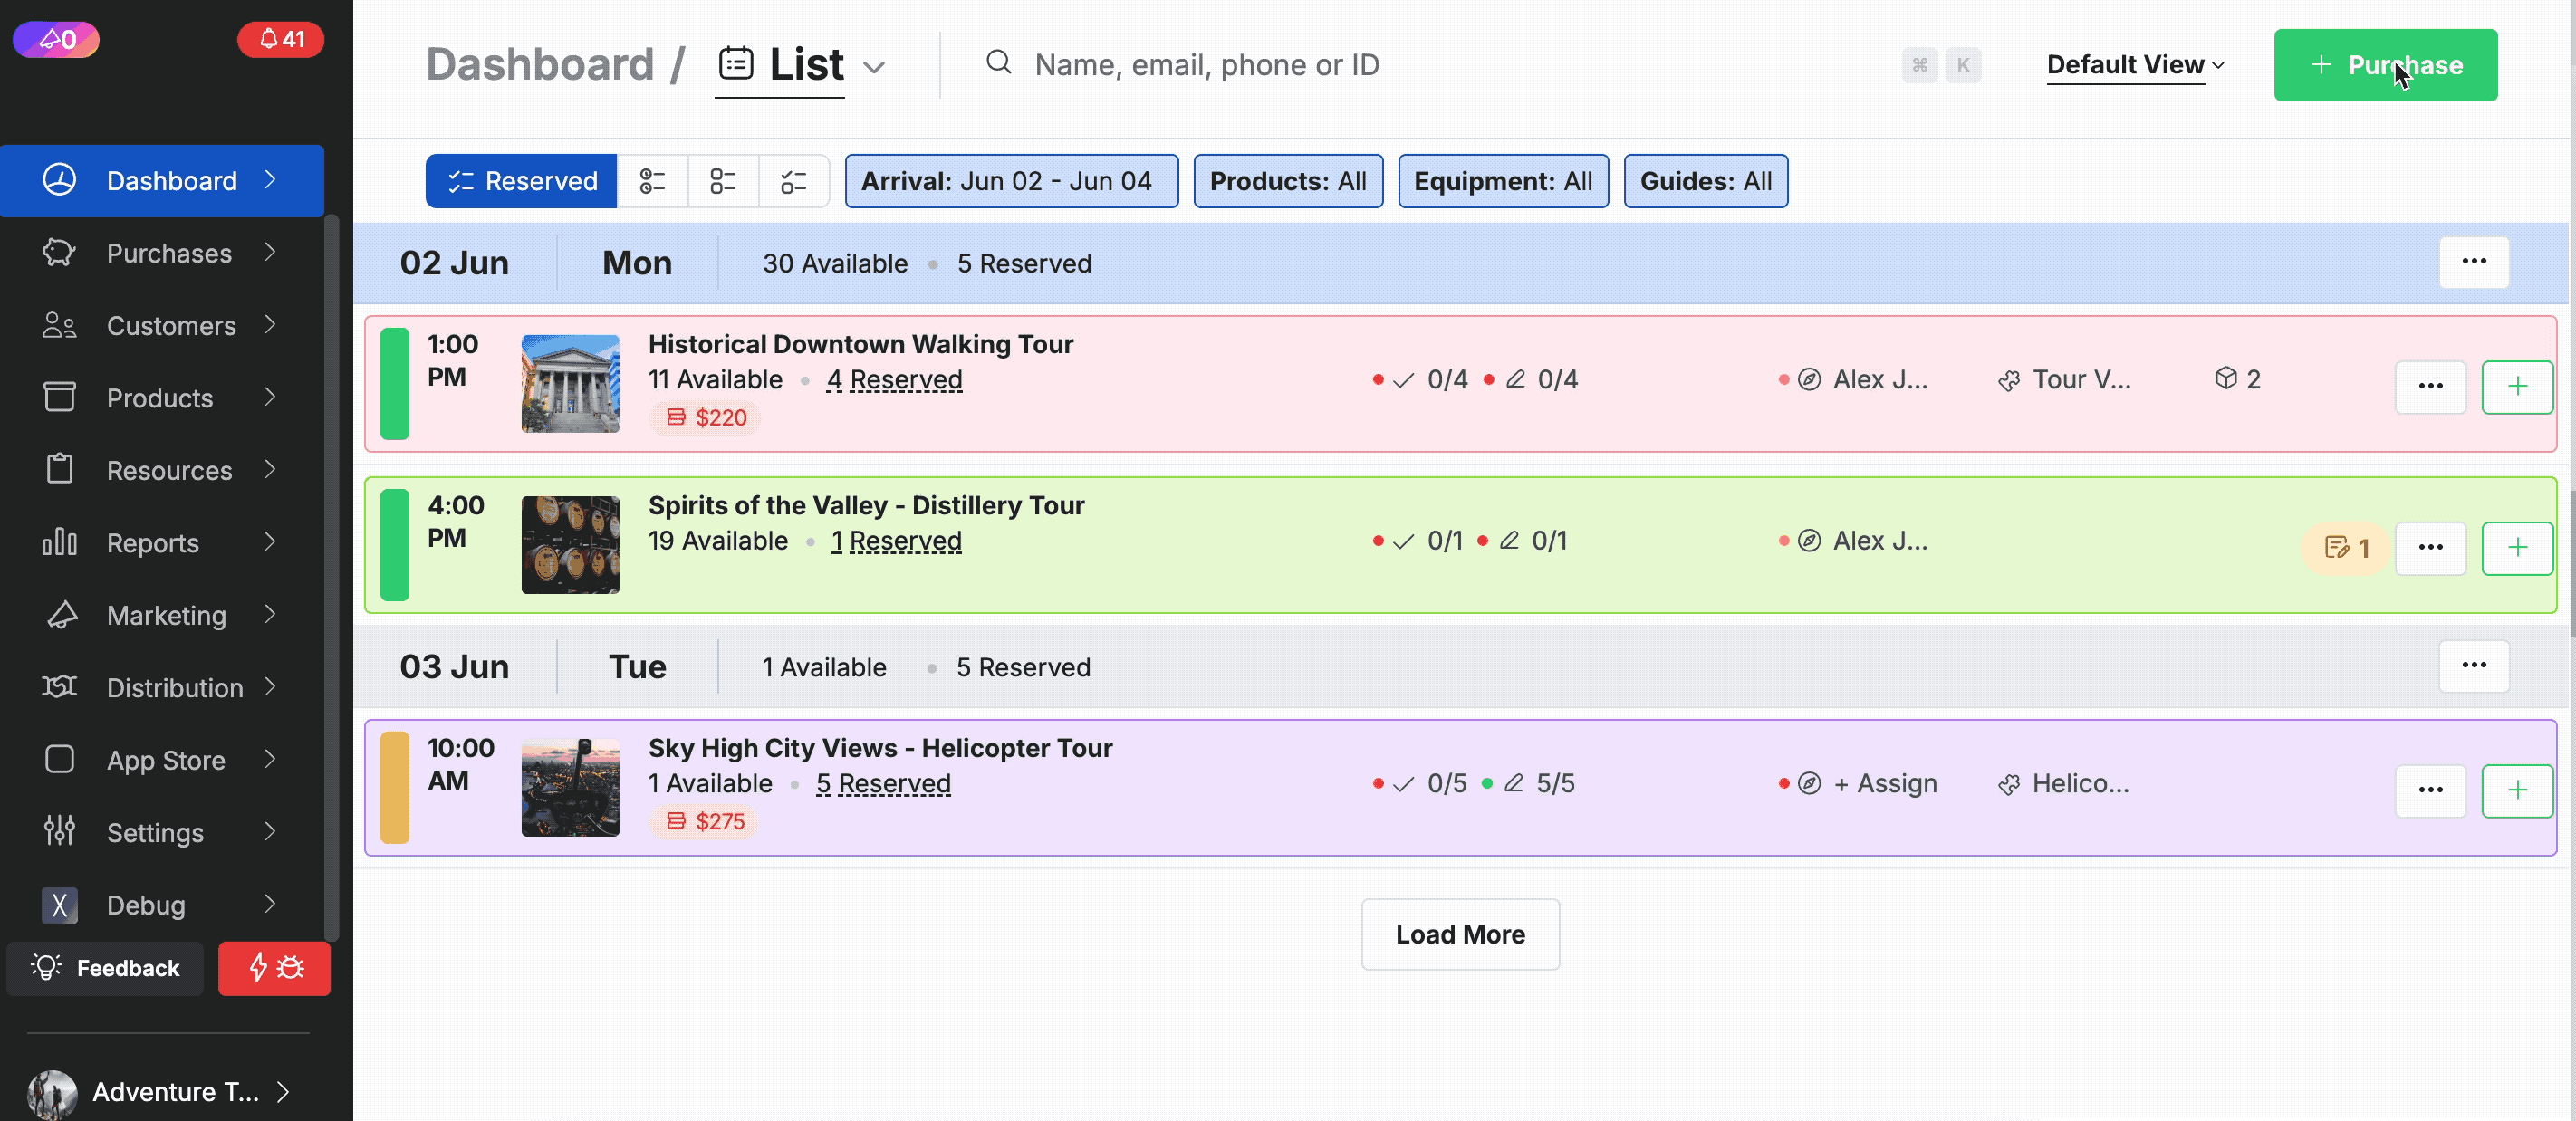
Purchase Directly from the Dashboard
List View
- From the List View, find the event you want and select the green Purchase button (+ sign) on the right.
- Alternatively, select the event and click the three-dot menu on the right, then choose +Purchase.
Day & Week Views
- From the Day or Week View, click an event, and then select the green Purchase button (+ sign).
Month View
- From the Month View, select the date of your desired event. This will take you to the Day View, where you can click an event, and then select the green Purchase button (+ sign)
