Self-Serve Kiosk
Empower Guests with Self-Service Check-In, Waivers, and Walk-Up Reservations in Your Lobby
Xola's Kiosk app is a guest-facing solution that allows your guests to sign Xola Waivers and check in for their reservations, streamlining your front desk operations and enhancing the guest experience right from the start. Featuring self-service capabilities on a tablet, guests can easily manage their reservations, sign important documents, and check in without needing to wait for staff assistance. This frees up your team to focus on high-value tasks and helps reduce bottlenecks during busy periods.
The Kiosk also integrates with the Stripe M2 Reader for secure credit card processing, transforming it into a powerful reservation station. This lets walk-in guests conveniently make their own reservations, select experiences, and complete payments directly in your lobby. This seamless self-service approach enables you to accommodate last-minute reservations, capture more revenue, and offer guests real-time access to your live availability—even outside of normal staffing hours.
Setup is both simple and flexible: compatible with Apple iPads (iOS 11 or newer) and Android devices (10+), the Kiosk fits the hardware you already have or can easily acquire. It’s a true end-to-end self-service solution—letting guests manage their journey from arrival to check-out, while you benefit from improved efficiency, less manual work, and happier, more independent customers.
User Access: Administrator, Reservationist Lite or Reservationist roles have access to Self Service Kiosk.
To grant access to users, click here.
What's covered in this article:
How to set up Kiosk
Follow these steps to set up the Self-Service Kiosk:
- Go to the Apple App or Google Play store on your iPad or Android Device.
- Search Xola Kiosk, and install the Xola Kiosk App.

- Once installed, open the App.
- Log into your Xola Account.
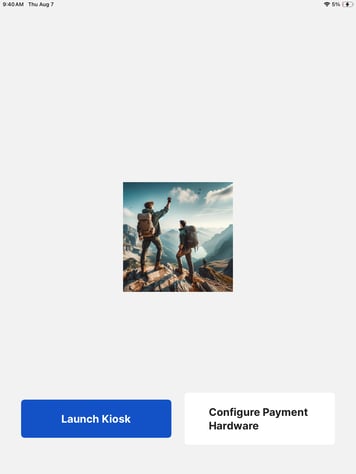
- Hit Launch Kiosk.

- Now you will be able to see the different functions your customers can do when they see the Kiosk.
When your guests approach the Kiosk, they will be greeted with a few options.
- Sign Waiver
- Check-In
- Make Booking (if you have the hardware stated above)
If your iPad locks automatically, your guests might not be able to self serve. To avoid this issue, you can change your iPad to never lock automatically. Go to Settings ![]() > Display & Brightness > Auto-Lock, then set a length of time to 'never'.
> Display & Brightness > Auto-Lock, then set a length of time to 'never'.
Sign Waiver
If your guest chooses the Sign Waiver Button they will follow these steps:
- Enter Name, Email, Phone Number or last 4 of the booking ID.
- This will pull up the reservation(s).
The Kiosk may pull up more than one reservation if they have multiple reservations in the system.
- If they need to sign a waiver, they can hit the green Sign Waiver Now button.
- The guest will then be presented with the Waiver to fill out and sign.
- After they sign, they will be given the option to sign another waiver if needed.
- This will automatically link any signed waivers back to their reservations and will show in your Xola Dashboard on the Roster and in the Purchases Tab.

Keep in mind, Kiosk will only pull up reservations for the present day.
Note: The Sign Waiver feature will only work with Xola Waivers. To learn more about how to set up Xola Waivers, please click here.
If you guest does not have any information about the reservation but still need to sign a waiver, they can follow these steps:
- Click on the I don't have my booking details under the search bar.
- Choose the experience they are attending
- The guest will then be presented with the Waiver to fill out and sign.
- After they sign, they will be given the option to sign another waiver if needed.
- This will not automatically link back to their reservations but you can manually link the waiver in your Xola Dashboard on the Roster and in the Purchases Tab.

Checking In
If your guest chooses the Check In Button, they will follow these steps:
- Enter Name, Email, Phone Number or last 4 of the booking ID.
- This will pull up the reservation(s).
Kiosk may pull up more than one reservation if they have multiple reservations in the system.
- To check in, they will hit the experience they are there for.

Keep in mind, Kiosk will only pull up reservations for the present day.
Pairing Payment Hardware
Any time that you launch the Kiosk App, you need to pair your Hardware Device.
- Power on your Stripe M2 reader.
- Log into the Kiosk App
- After logging in, click the Configure Payment Hardware button.
- Set the POS Label if it is not already set.
- Click the Discover Devices button.
- Click the Connect button in line with your device.
- Once paired, click the green Open Checkout button in line with your device.

When clicking on Pair, if the Card Reader needs to update, The Kiosk App will automatically update the reader while pairing.

Making a Booking
The Kiosk allows your guest to make walkup reservations themself.
Credit Card is the only method of payment that is accepted by Kiosk.
Required:
- Mobile Compatible card reader
- Account needs to have EMV enabled (contact support)
Making a reservation via the Kiosk app is similar to the web checkout experience.
- From the Kiosk home screen, press the Book Now button.
- Select an experience.
- Select the Date and Time for the activity.
- Select the number of guests.
- Provide the organizer's contact information.
- Collect payment (credit card only) to complete the reservation.
Once the payment is accepted, the guest can click the Sign Waiver or Finish button to complete the transaction.
