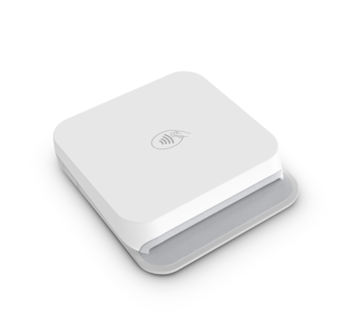
The Stripe Reader M2 is a compact, battery-powered, mobile card reader designed to bring flexibility and convenience to your iOS or Android-based setup. It supports a wide range of payment methods, including EMV chip cards, magnetic stripe swipes, and contactless transactions via popular mobile wallets like Apple Pay and Google Pay.
Designed for mobility, the Stripe Reader M2 connects to your device via Bluetooth, making it ideal for on-the-go sales, outdoor check-in, mobile events, or any business operation that benefits from untethered functionality. Its lightweight design and long battery life make it perfect for staff who are constantly on the move.
For countertop use, the Stripe Reader M2 is compatible with an optional dock or tablet mount, giving you the flexibility to convert it into a semi-permanent checkout station as needed. Whether you're taking walk-up reservations, completing transactions in the field, or enabling mobile check-in for tours and events, this reader provides a secure and professional Tap-to-Pay experience for your guests.
With seamless integration into the Xola, the Stripe Reader M2 ensures fast, reliable, and secure transactions, helping your team deliver smooth, high-quality customer interactions—no matter where business takes you.
User Access: Administrator, Reservationist Lite or Reservationist roles can set up credit card readers and process payments using Xola hardware.
To grant access to users, click here.
Reader M2 is for Mobile Devices - US ONLY
What's covered in this article:
About the Reader M2
Reader M2 is for Mobile Devices - US ONLY
-
Works with iPhone and iPad and Android Devices - Not compatible with desktop computers!
Note: This device is currently available for mobile only; read about desktop compatible payment hardware here.
Need a device for CA or UK? The BBPOS WisePad 3 is only available for CA & UK.
How to Set Up the Reader M2
Please make sure you have purchased a Reader M2 before installing the EMV app. The Stripe Reader M2 is available for US only, and be purchased here.
Ensure the EMV app is installed in your Xola account. To do this:- Navigate to Settings > Apps and scroll through the list of apps until you locate one titled EMV.
.png?hsLang=en)
If the app is not already installed in your Xola account, take these next steps:
-
- Navigate to the App Store tab.
- Locate EMV, and select the App Store tile.
- Click the green Install button.
.png?hsLang=en)
Xola Phone App
- Once installed from the Xola App Store, you must also download the current version of the Xola Phone app for your mobile device.

- When you open the Xola Phone App on your mobile device, tap Accept when prompted to allow Bluetooth.
- Power on the Reader M2 device.
- When ready to connect, the device’s light will flash blue every 1-3 seconds.
- You are now ready to pair the device.
- In the Xola Phone App, go to Settings.
- Tap Payment Hardware.
- Under Payment Device Type, select Bluetooth payment device.
- Once the Reader M2 device is discovered, the name of the device (ex: CHB000000000000) will be displayed under the Nearby Devices column.
- Tap the Connect button to the right of the device name.
- A Bluetooth Pairing Request message will appear; select Pair.
- A green message on your phone screen confirms the device is successfully connected.
- A yellow dot will be next to the Settings icon in the Xola Phone app until standby mode is activated.
- Once connected and ready the device status will be indicated by a green dot next to the Settings icon on the lower right corner of the app.
If you successfully complete the above steps, you are now ready to take payments. A new payment option will be available when making a purchase in the back office.
On the payment screen, ensure the ![]() icon is selected as the Method. You will have 5 minutes to process a card. If it fails, you can try another card or use a different payment method. All purchases made via your Chip & Pin hardware will be tagged EMV.
icon is selected as the Method. You will have 5 minutes to process a card. If it fails, you can try another card or use a different payment method. All purchases made via your Chip & Pin hardware will be tagged EMV.
Xola Kiosk App
- Once EMV is installed from the Xola App Store, you must also download the current version of the Xola Kiosk app for your tablet device.
.png?hsLang=en)
- Power on your M2 Reader.
- Log into your Xola account in the Kiosk App.
- After logging in, click the Configure Payment Hardware button.
- Set the POS Label if it is not already set.
- Click the Discover Devices button.
- Click the Connect button in line with your device.
- Once paired, click the green Open Checkout button in line with your device.
.gif?hsLang=en)
Note: Any time that you launch the Kiosk App, you need to pair your M2 Reader.
For more instructions and troubleshooting from Stripe, click here.
Other Xola Hardware Devices
Please reference the table below for a breakdown of each Xola card reader's compatibility.
| Supported Countries | Device(s) | Mobile / Desktop | Xola App | Connection | Price** | Where to Purchase | |
| BBPOS WisePOS E | US, CA, UK, EU |
Desktop Computers/Laptops Tablets |
Desktop Only |
Xola Tablet app |
Bluetooth |
$349 for BBPOS card reader $49 for the dock |
|
|
Stripe Reader M2 |
US |
Phones Tablets |
Mobile Only |
Xola Phone mobile app Xola Kiosk app |
Bluetooth |
$99 for Stripe Reader M2 $19 for the dock $12 for the Tablet mount |
|
|
BBPOS WisePad 3 |
CA, UK, EU | Phones | Mobile Only |
Xola Phone mobile app Xola Kiosk app |
Bluetooth |
$119 for the card reader |