Smartwaiver is a leading digital waiver solution that enables your guests to sign waivers online before arrival, eliminating the hassle of paper forms at your front desk.
By integrating Smartwaiver with Xola, you can streamline the guest check-in process, reduce administrative work, and ensure that every participant has a completed waiver on file before their reservation begins. This integration helps you stay organized, compliant, and focused on delivering an exceptional guest experience—while minimizing delays and manual follow-up.
Let your guests sign from anywhere, and rest easy knowing all waivers are securely stored and automatically linked to their reservations in Xola.
To take advantage of the Smartwaiver integration, you'll need to open a Smartwaiver account. To contact Smartwaiver, click here.
User Access: Administrator or Marketer roles have access to set up and manage Smartwaivers in Xola.
Administrator or Reservationist roles can view and link Smartwaivers to reservations and manage which products are assigned to waivers in Xola.
Reservationist Lite roles can view and link Smartwaivers to reservations in Xola.
Equipment Manager, Guide Manager or Guide roles can only view Smartwaivers linked to reservations on the Roster.
To grant access to users, click here.
What's covered in this article:
How to Get Started
- Get your Smartwaiver API Key
- You’ll need your API Key from Smartwaiver to connect the integration in Xola:
- Log into your Smartwaiver account.
- Go to My Account > API Access.
- Copy your API Key from this page - you’ll need it in the next step.
- You’ll need your API Key from Smartwaiver to connect the integration in Xola:
- Connect Smartwaiver in Xola
- Once you have your API Key, connect Smartwaiver in Xola:
- Log into your Xola account.
- Go to the App Store.
- Find Smartwaiver, and click Install.
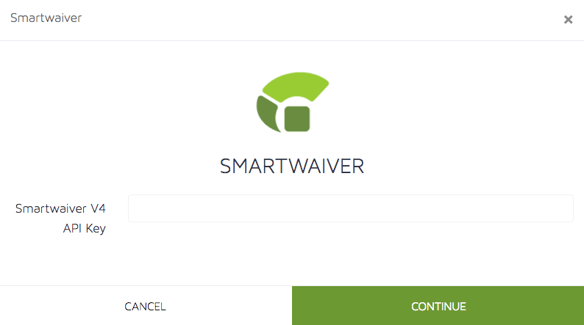
- Paste your Smartwaiver API Key into the field provided.
- Click Connect.
- Once you have your API Key, connect Smartwaiver in Xola:
- Enable Waivers for Your Products
- To assign Smartwaivers to your products:
- Go to Customers > Digital Waivers in Xola.
- Click the
 button to access waiver settings.
 - Select the products you want to link to Smartwaiver.
- Click Save.
- To assign Smartwaivers to your products:
Once enabled, your guests will automatically receive a link to the waiver in their confirmation email after placing a reservation. When the waiver is signed, it’s automatically attached to the customer’s reservation in Xola.
How it Works
After setup:
-
Each product in Xola can be connected to a specific Smartwaiver template.
-
When a guest makes a reservation, their reservation confirmation email will include a unique link to sign the associated waiver.
-
Guests who haven’t signed the waiver will be flagged in the Xola Roster.
-
Once a guest completes the waiver, their signed waiver appears directly in Xola, attached to their reservation.
A few key details:
-
-
Waivers are matched to participants by name and email.
-
If multiple people are reserved under one name, one guest can sign for multiple participants (based on your Smartwaiver settings).
-
Tips for Success
-
- Match waiver templates to products: Be sure each tour or activity has the correct waiver assigned. This prevents confusion for guests and staff.
- Encourage waivers pre-arrival: Use confirmation and reminder emails to prompt guests to sign before they arrive. You can set this up in Xola Settings.
- Keep waivers updated: If you update your waiver in Smartwaiver, double-check the integration still points to the correct template.
- Test the flow: Do a test reservation to see how the waiver appears to guests and how it's tracked in Xola. It’s the best way to ensure a smooth experience.