Xola’s Pre-Check feature lets you collect photo ID and live selfie verification through a simple, mobile-friendly flow that guests can complete from their phone or any connected device. A secure pre-check link is automatically included in confirmation emails (and can be resent if needed), so guests can submit their details well before arrival, reducing check-in time and lines on the day of the experience.
With Pre-Check, you can capture and attach:
- Government-issued ID (front and back) for age or identity-sensitive activities
- A live selfie (camera required, no file uploads) to confirm the guest matches their ID
- Full legal name, matched against the ID for added assurance
- Signature and verification acknowledgment to document consent and policies
Once submitted, all captured data is automatically synced into the reservation questionnaires in the Purchases tab and reflected on your roster, so your team has everything in one place to review, verify, and manage guests before they arrive. This helps you streamline operations, reduce fraud, and create a smoother, more professional check-in experience for both staff and guests.
User Access: Administrator roles have access to set up and have access to the view and manage Pre-check in the Roster and Purchases Tab.
Reservationist and Reservationist Lite roles have access to view and manage Pre-check in the Roster and Purchases Tab.
Equipment Manager and Guide Manager roles have access to view Pre-check in the roster.
Guide roles can only view Events they are assigned to, with the Pre-check in the roster.
To grant access to users, click here.
What's covered in this article:
How to set up Pre-Check
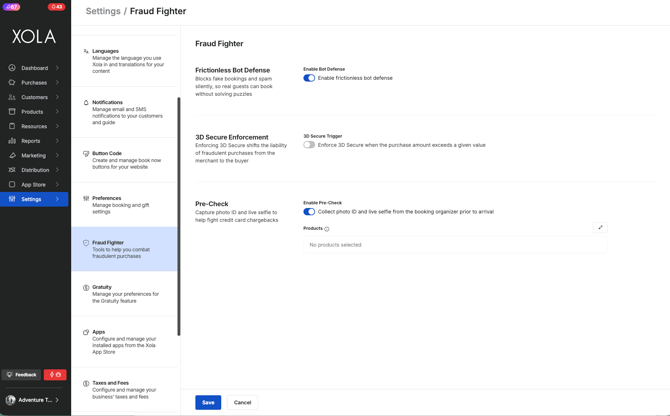
To set up Pre-Check go to Settings> Fraud Fighter.
- Toggle on the Pre-Check.
- Next, choose the products you want this to apply to.
- If you enabled for all products, new fields will be included as part of your global questionnaire.
- If you select only specific products, Xola will override your global questionnaire at the experience level and apply new fields only to that experience.
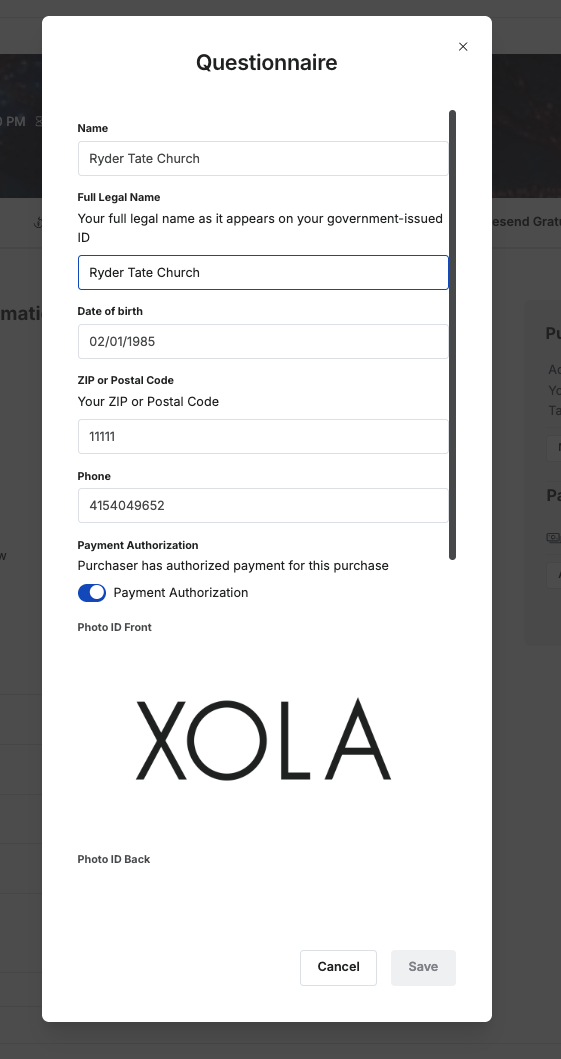
PreCheck Questionnaire questions:
Once enabled and the products are chosen the following questions will appear in your questionnaire, and will only be asked to the organizer of the tour:
-
Full Legal Name
- Date of birth
- ZIP or Postal Code
- Phone: Auto populated from the checkout.
- Payment Authorization: Must be agreed to by the guest
- Photo ID Front: Must be uploaded from the guest
- Photo ID Back: Must be uploaded from the guest
- Selfie: Must be taken by the guest
- Signature: Must be done by the guest
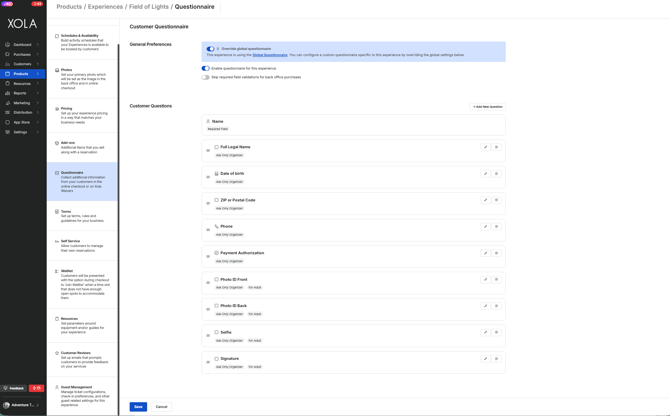
Note: If you already have questions in your existing questionnaires, Pre-Check fields will be added alongside them—your original questions will still appear.
If you edit any of the Pre-Check questions, it will disrupt the workflow and the Pre-Check section will no longer appear in the confirmation email.
To learn more about questionnaires, click here.
What your customer sees
The new questions will appear in your customer’s confirmation email in a dedicated Pre-Check section, clearly separated from the rest of the message so they’re easy to find. From there, the guest can click Start Pre-Check to see exactly which details are required before their experience.
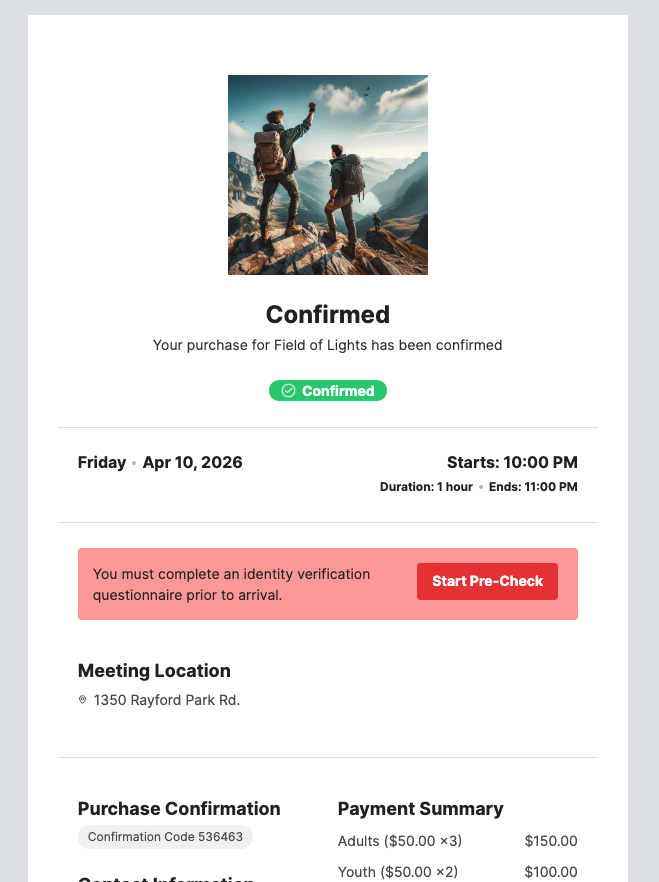
When the customer clicks the Pre-Check button in the email, they’ll be taken to a secure page where they can start the Pre-Check.The will be asked to click Continue.
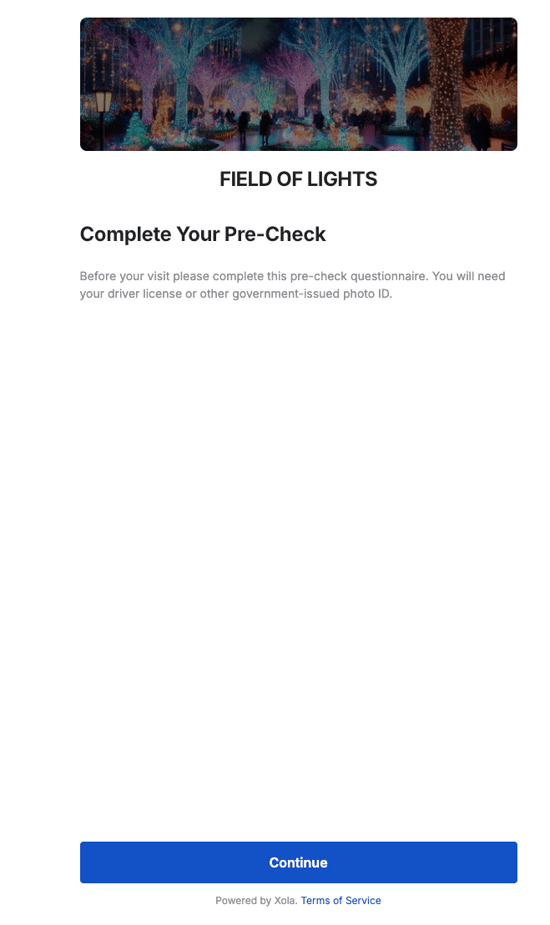
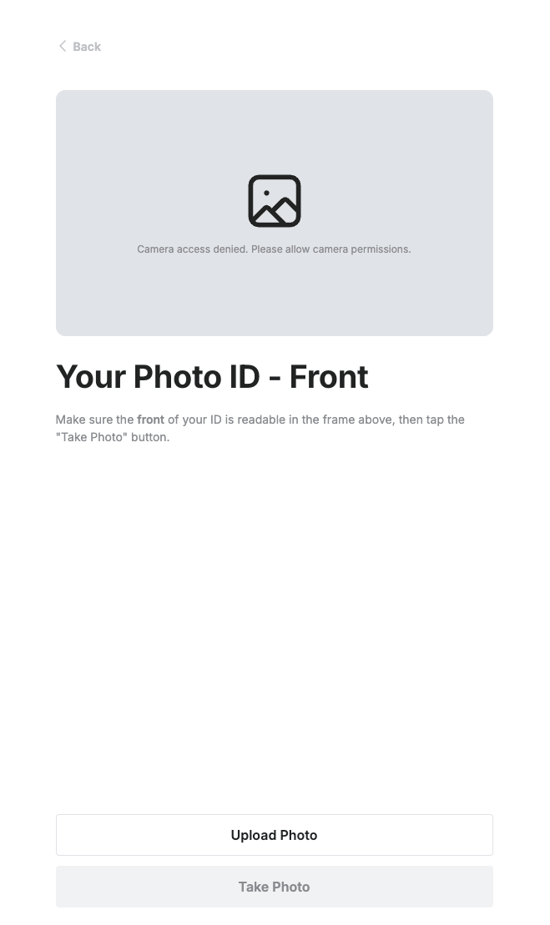
After that they will be asked to upload or take a picture of their photo ID front and back.
Next, they will take a live selfie with their camera
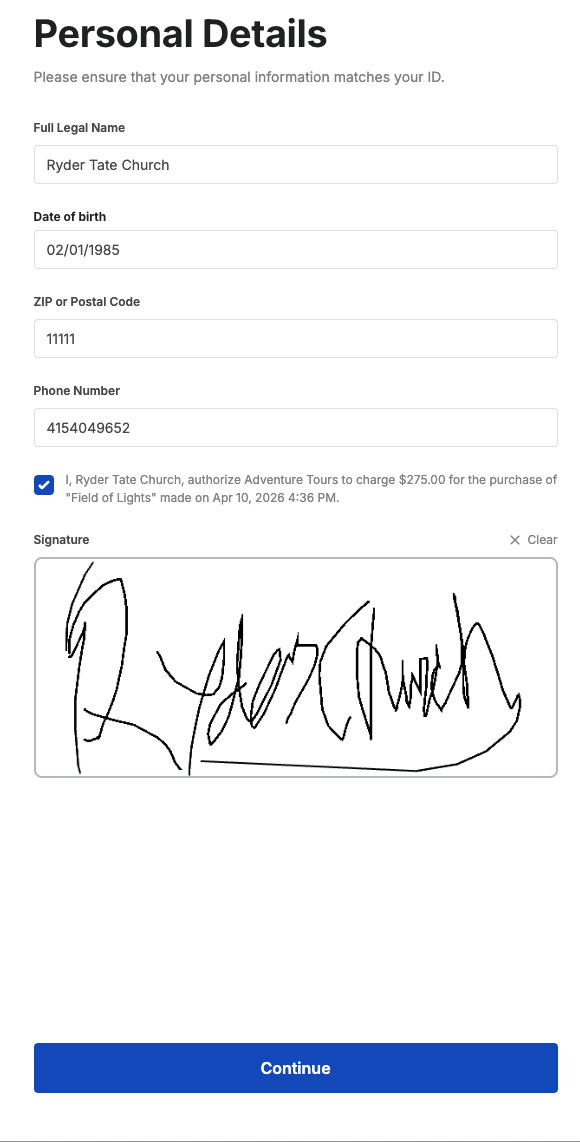
Finally, they’ll be prompted to complete a short questionnaire that includes their full legal name, date of birth, ZIP/postal code, phone number, a payment authorization checkbox, and a signature.
Note: This flow is designed to work smoothly on both desktop and mobile devices, so guests can complete it from home or on the go.
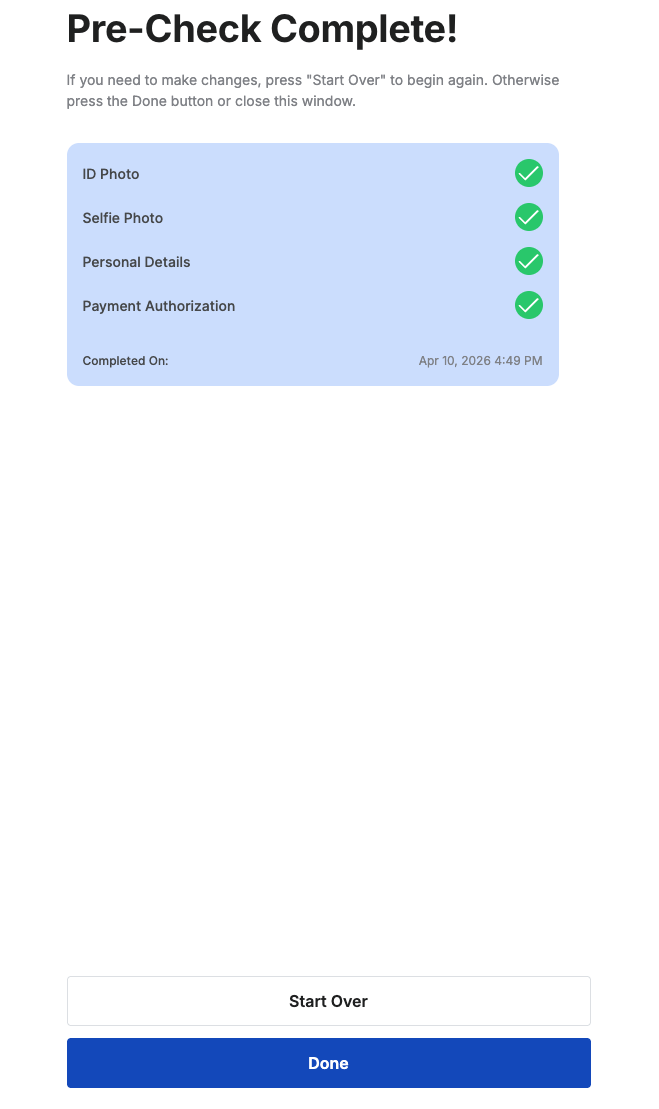
Once the guest submits their information, all Pre-Check data is automatically attached to their reservation.
How to Manage Pre-Check information
After the customer uploads and submits their Pre-Check information, all of the collected data—ID images, selfie, questionnaire responses, and signatures—is automatically attached to their reservation record. You’ll be able to see this in two places the Roster and the Purchases Tab.
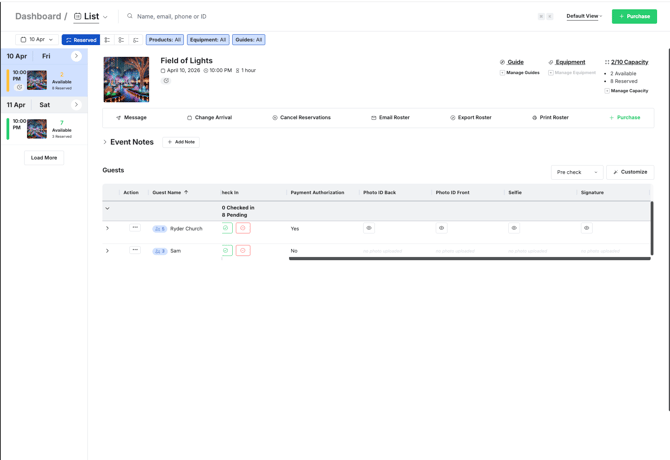
On the Roster
Under the Guest section of the Roster, each applicable event and reservation will display a Pre-Check status and key details for the organizer, allowing reservationist and guides to quickly confirm that identity verification and required fields are complete before guests arrive. they can also check the information with the customer when they arrive.
Roster Customization
Roster customization allows you to pick and choose which columns you see and in which order. Additionally, you can save these customized roster views and toggle between them.
To customize the visible columns, click the Customize button to the right:
- Toggle on and off the information that you would like to see on your roster including the Pre-Check questionaire questions.
- Click Apply.
- Next, to adjust the order in which columns appear, click and hold the three lines next to the column title and drag the column to the desired spot by scrolling left or right.
- You can also pin columns to the left or right, so they stay frozen as you scroll over to other columns in the router. Simply click on the three lines and click 'pin left' or 'pin right'.
- Now, to save the roster customization, click on the button to the left of Customize that says 'Xola Default' > Select Save as New View > Assign a name to the customized view > Click Save.
Tip: Click the star next to the Roster view name to set it as the default view. This means next time you log in, this view will appear.
When you view the roster with Pre-Check fields enabled in the guest section, you’ll be able to see at a glance who has completed Pre-Check and who has not.
-
Guests who have finished Pre-Check will display an
 icon that you can click to open and review their details. After you open the image on the roster, you’ll see the following options:
 : Download the image
 : Copy the image
 : Refresh the image
-
For guests who have not completed Pre-Check, you’ll see “no photo upload,” and the payment authorization field will display “no.”
On the Purchases Tab
On the purchase tab you will see the full Pre-Check record, including uploaded documents and answers to all Pre-Check questions. This will all show under the Attendees Section:
To see or edit the pre-check answers, click on the ![]() button with the colored dot next to it. Here you can edit or add any free-text fields in the questionnaire. You won’t be able to upload photos—only the guest can do that.
button with the colored dot next to it. Here you can edit or add any free-text fields in the questionnaire. You won’t be able to upload photos—only the guest can do that.
If the guest has already uploaded images, you can hover over an image to:
- : View the image larger
- : Download the image
- : Copy the image
- : Refresh the image