In Xola, you have the ability to add different types of notes that help you and your team stay organized and informed about a specific reservation or customer. These notes act as a quick reference for important details, ensuring that nothing is overlooked and that everyone on your staff has access to the same information.
You can add notes at various stages, including during the purchase creation process, directly in the Purchases tab, or on the event roster. This flexibility allows your team to capture relevant updates exactly where they are needed. By centralizing this information, Xola enables streamlined communication, better collaboration, and accurate record-keeping for all reservations.
User Access: Administrator or Reservationist roles have access to add, edit and delete Purchase, Event, and Customer notes.
Reservationist Lite roles have access to only add and edit Purchase and Event notes.
Equipment Manager or Guide Manager roles can only view Purchase and Event notes.
Guide roles can view Purchase notes and add, edit and delete Event notes only.
To grant access to users, click here.
What's covered in this article:
Adding a Purchase Note
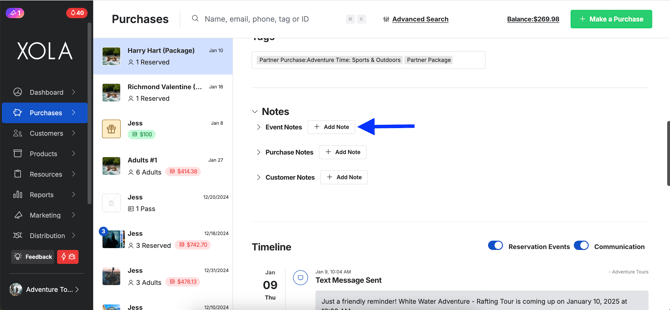
A Purchase Note is used to inform your staff about a specific reservation and any relevant details. For example, it may include information about changes made to the reservation that the staff needs to be aware of for future reference.
While making a purchase
- Click on Make a Purchase in the top right of your screen.
- Select your product.
- After entering customer details and payment information, use the toggle to enable Internal Notes.
- Type in your note in the Purchase Note field.
- Confirm the purchase to save your note.
- These notes will show on the Purchase tab as well on the Event Roster.

From the Purchases tab
- In the Purchases tab, navigate to the customer purchase.
- In the Notes section, click the +Add Note button next to Purchase Note.
- In the pop-up, enter your note and then click the Add button.
- The note will now appear under the Purchase Notes drop-down and on the Event Roster.

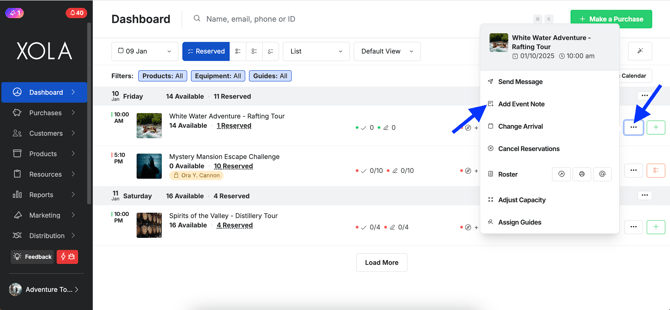
From the Dashboard Quick Search
- On the Dashboard, type in the customer's name, email, or phone number in the quick search bar.
- Within the results section, click the
 icon, then Add Purchase Note.
 - In the pop-up, enter your note and then click the Add button.
- The note will now appear under the Purchase Notes drop-down and on the Event Roster.

From the Event Roster
- On the Dashboard, find the event and click on it. This will open the Event Roster.
- Find your customer in the guest section, click the icon next to their name, then Add Purchase Note.
- In the pop-up, enter your note and then click the Add button.
- The note will now appear under the Purchase Notes drop-down and on the Roster.
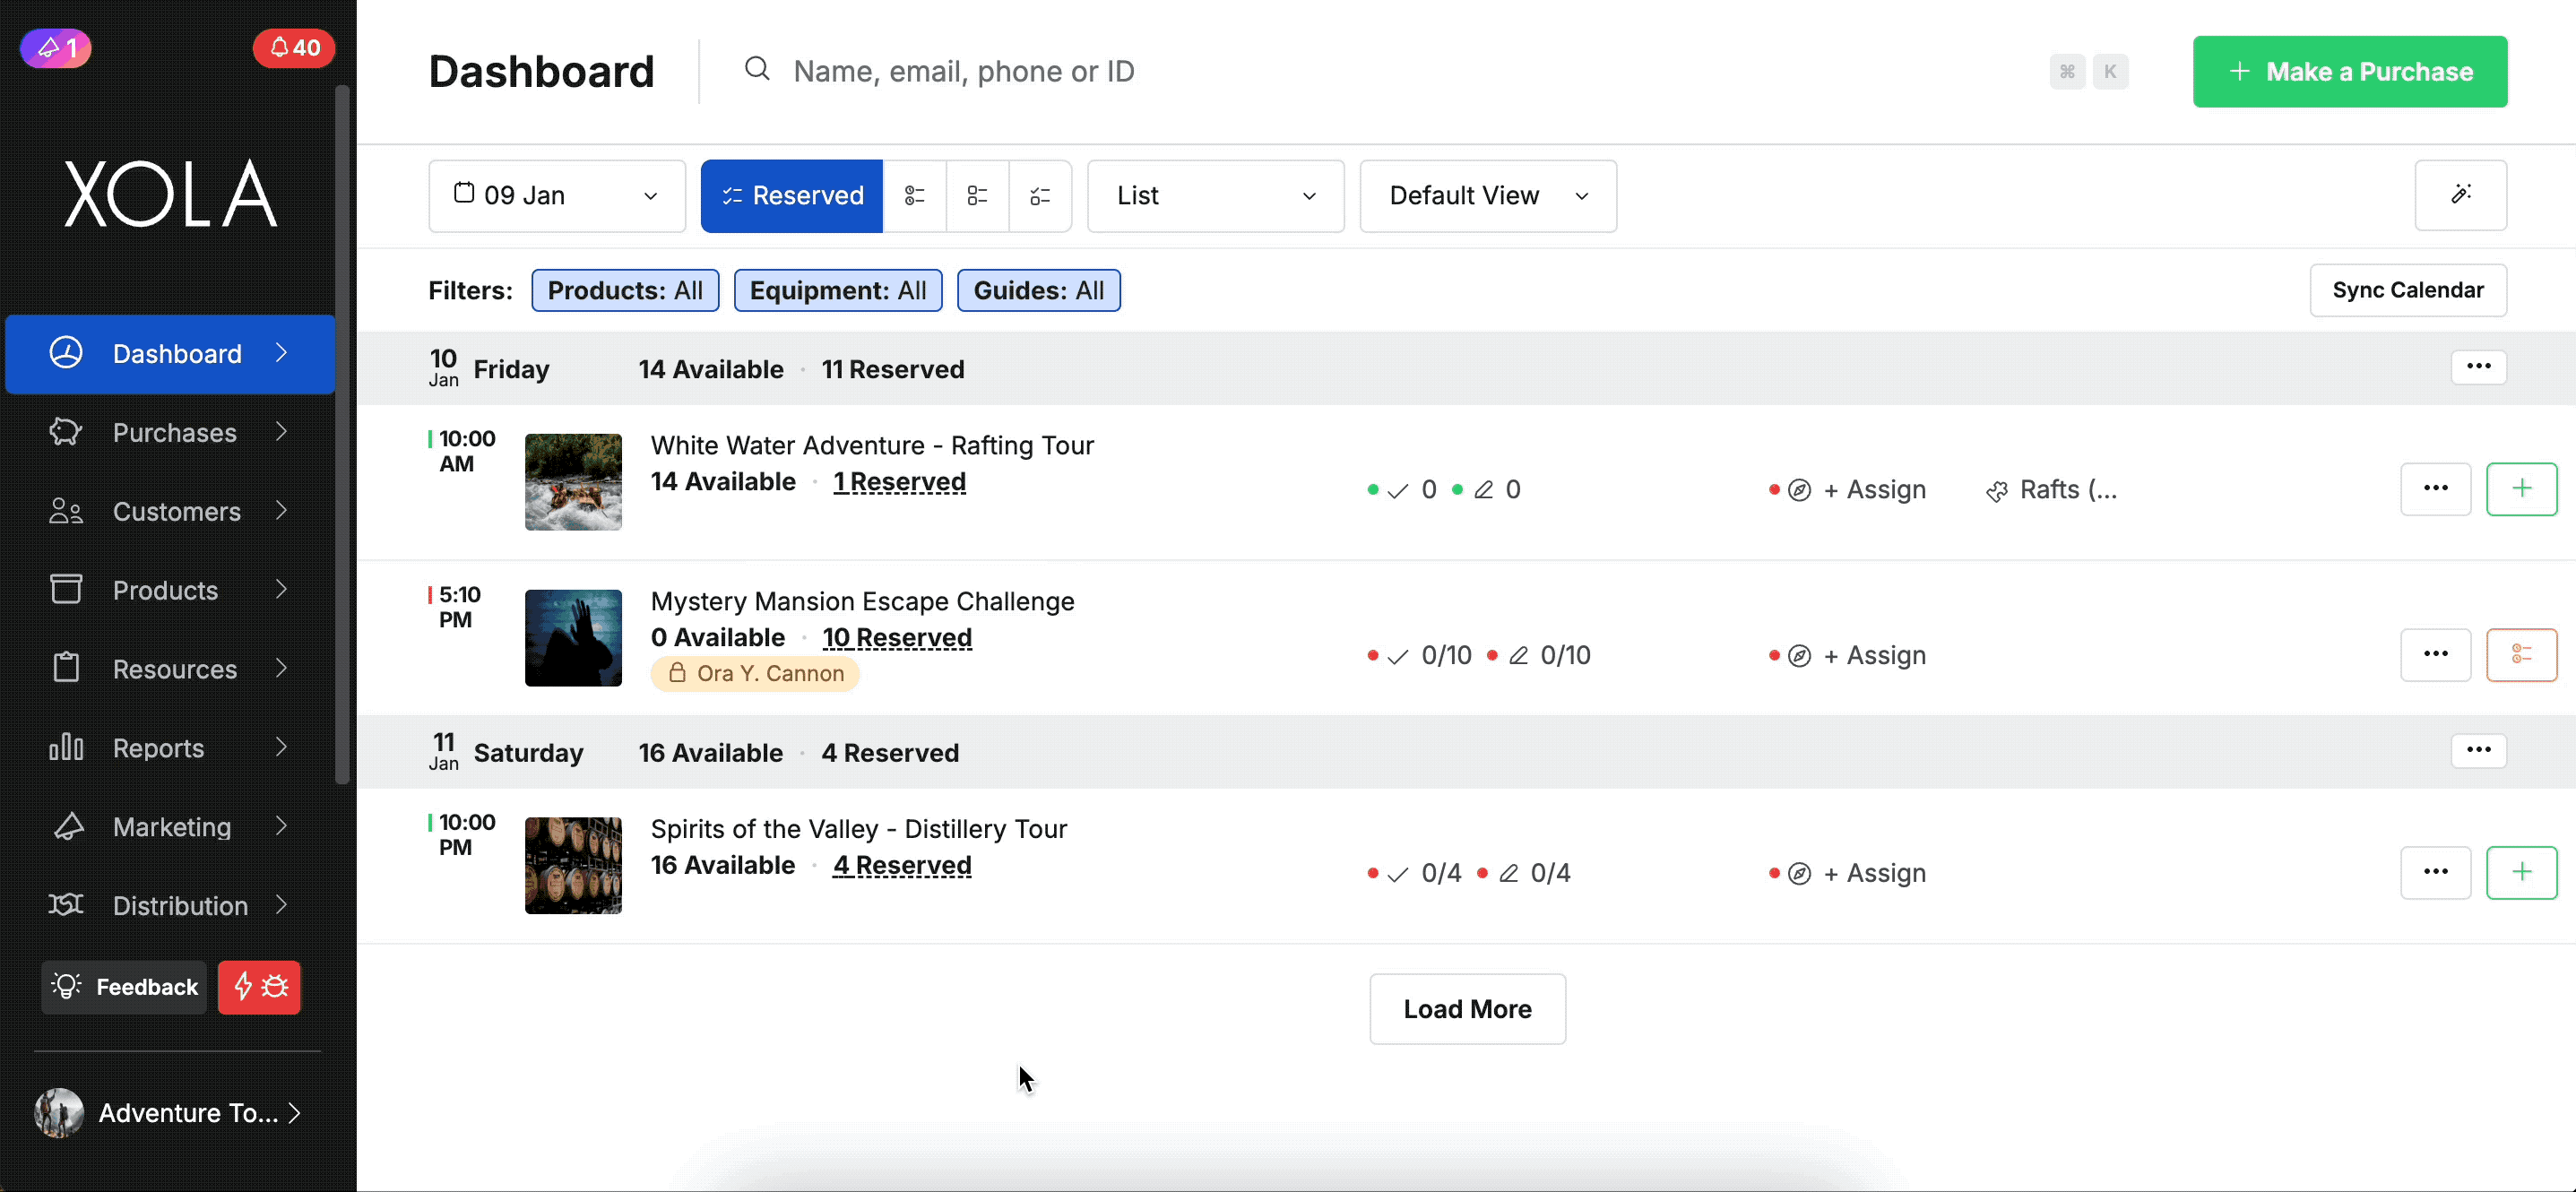
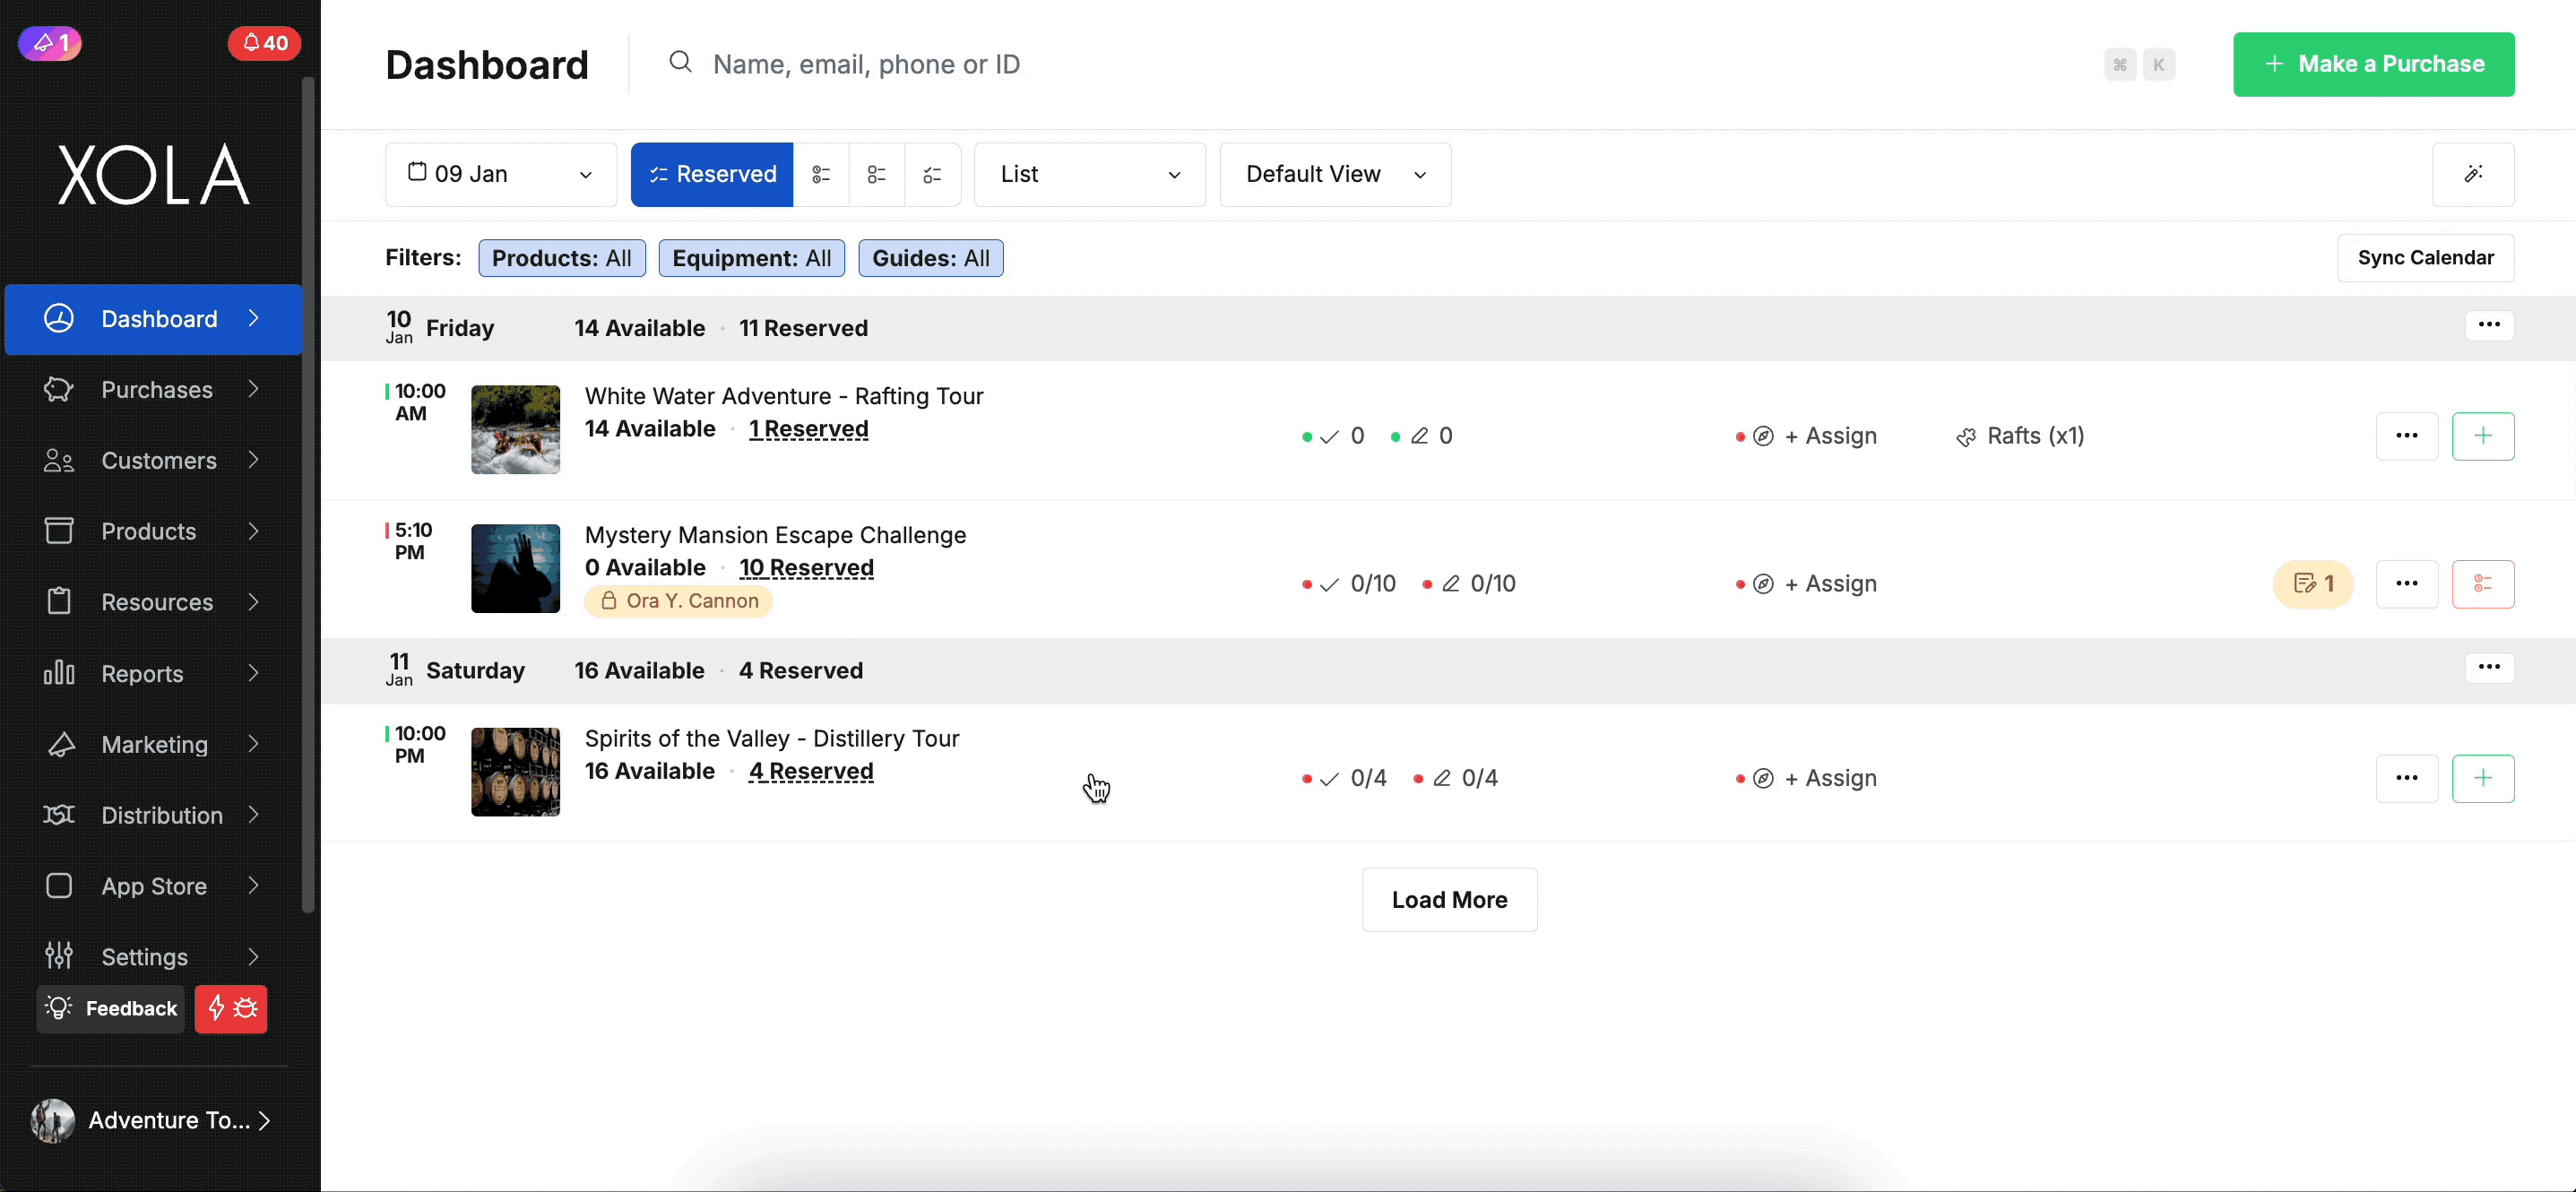
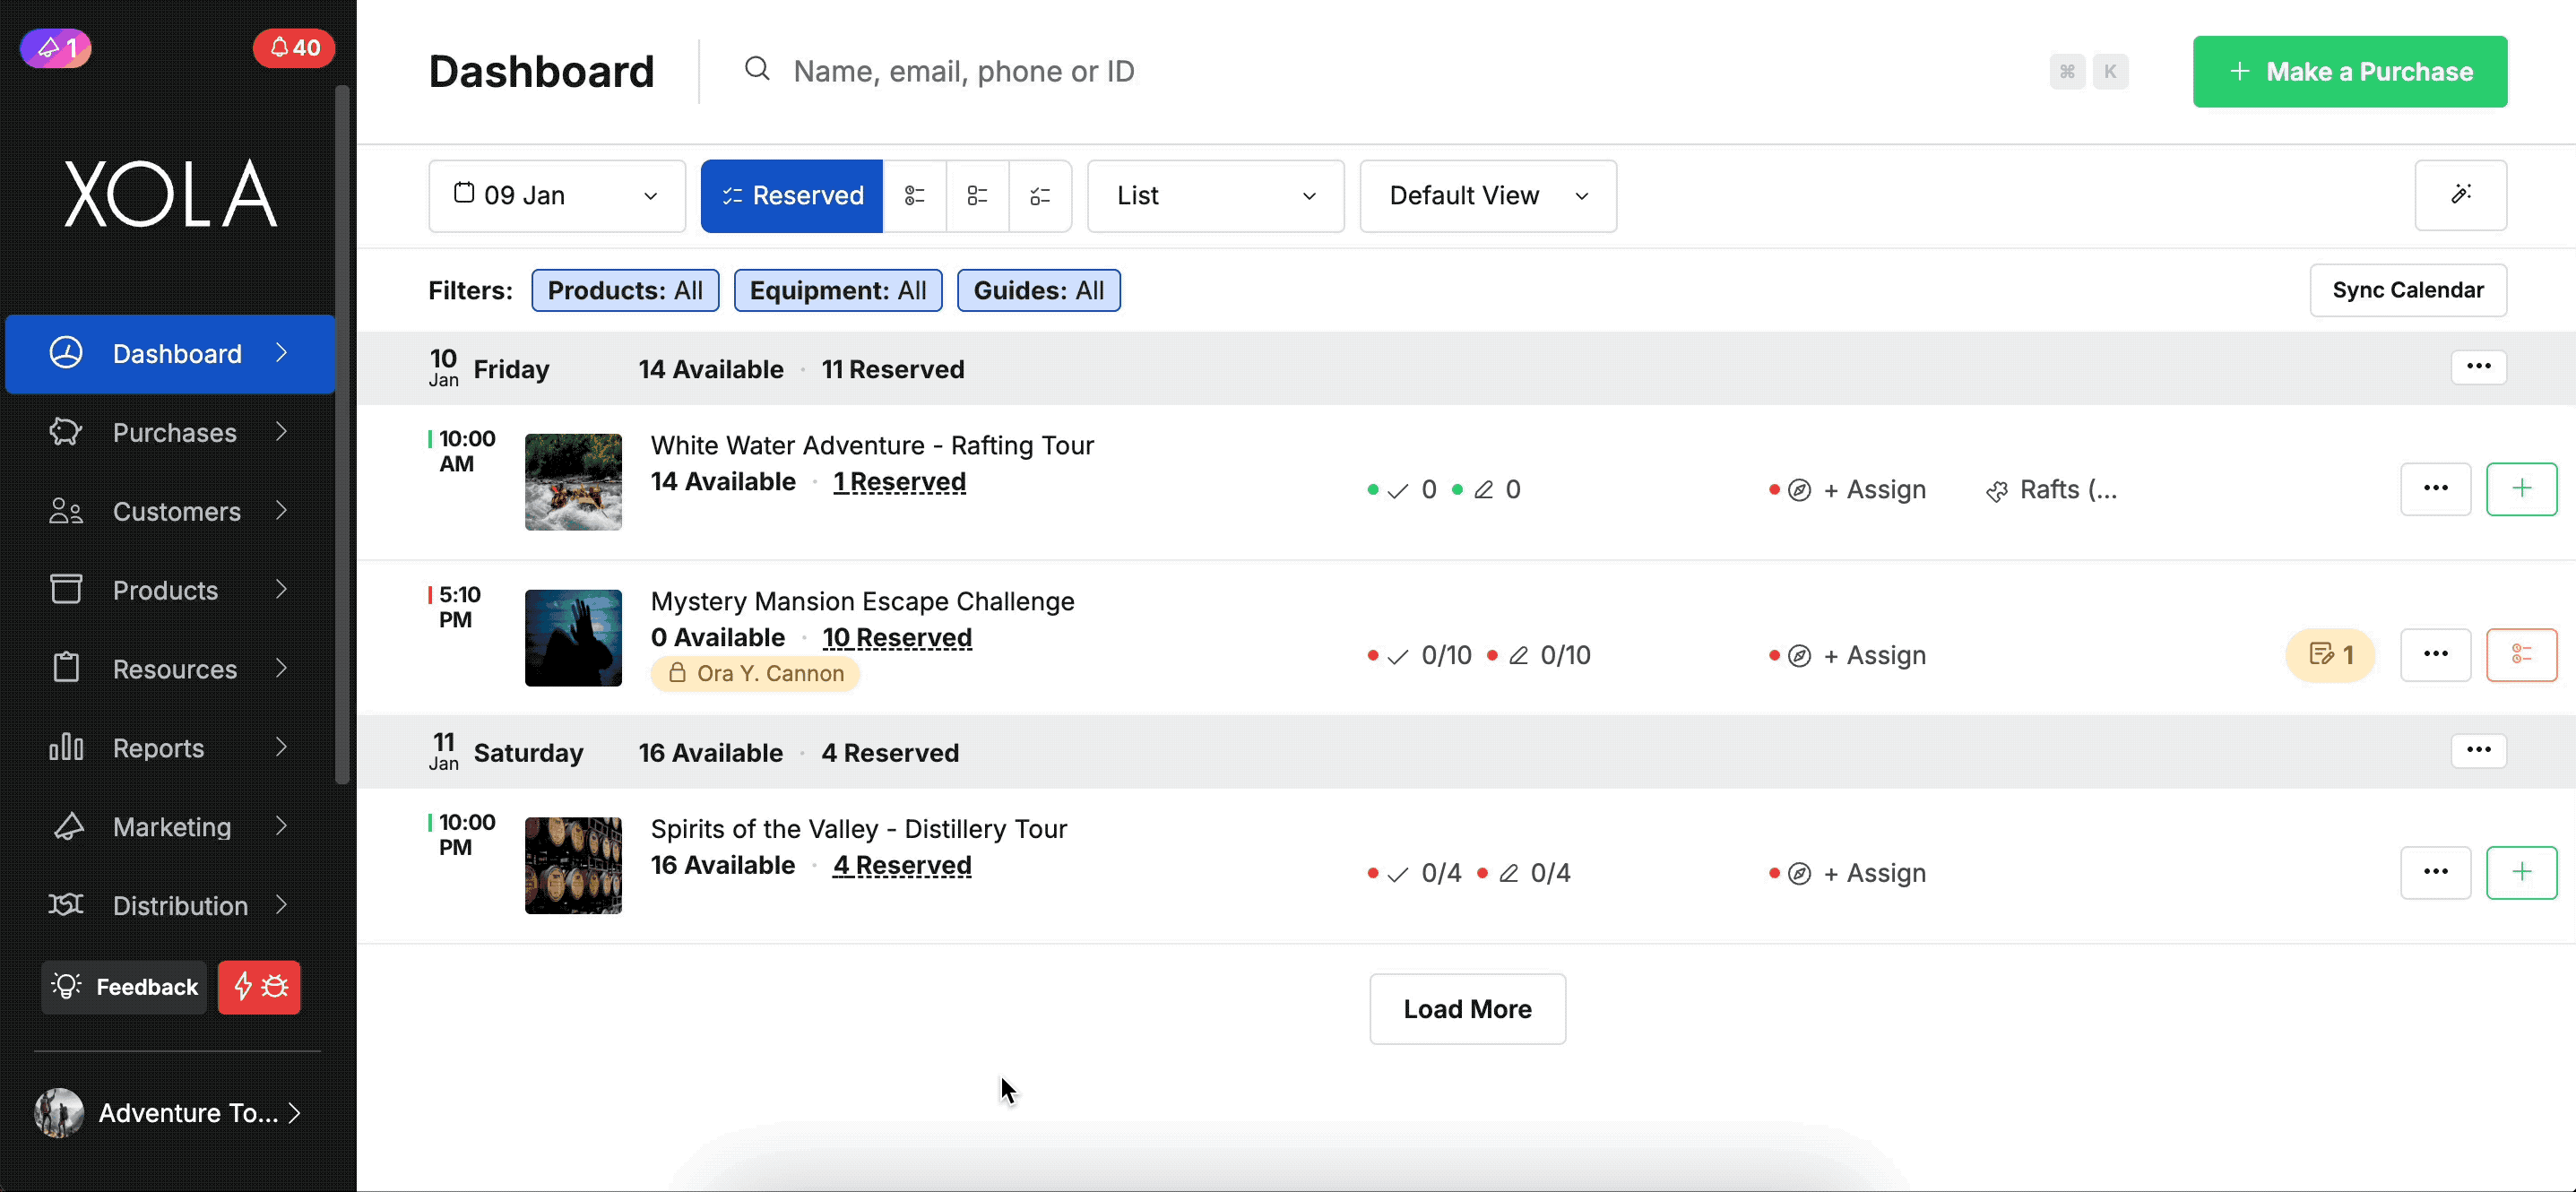
Updating Purchase Notes from the Dashboard
- On the Dashboard, find the event and click on the note icon.
- In the pop-up, edit any note.
Adding an Event Note
An Event Note is used to inform staff about the details of a specific event or timeslot. This note may include important information that the staff needs to know when reviewing the day’s schedule.
From the Event Roster
- On the Dashboard, find the event and click on it. This will open the Event Roster.
- Select the + Add Note button.
- Type in your note. When you are finished, click the Add button.
- The note will now appear under the Event Notes drop-down on the Purchases Tab and the Event Roster.

From the Purchases tab
- In the Purchases tab, navigate to the customer purchase.
- In the Notes section, click the +Add Note button next to Event Note.
- In the pop-up, enter your note and then click the Add button.
- The note will now appear under the Event Notes drop-down and on the Event Roster.
From the Dashboard
- On the Dashboard, find the event.
- Click the icon, then Add Event Note.
- Select the + Add Note button.
- Type in your note. When you are finished, click the Add button.
- The note will now appear under the Event Notes drop-down on the Purchases Tab and the Event Roster.
Updating Event Notes from the Dashboard
- On the Dashboard, find the event and click on the note icon.
- In the pop-up, edit any note.
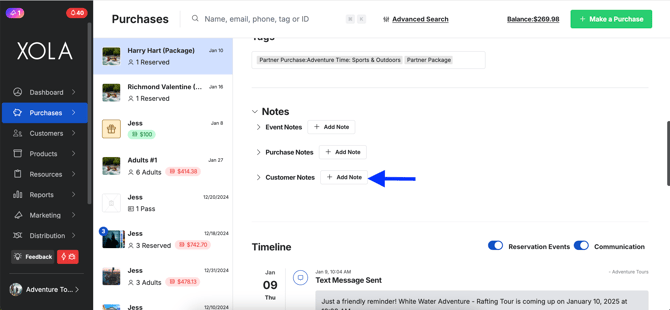
Adding a Customer Note
A Customer Note is used to record important information about a specific customer. For example, this note can inform your staff about particular details regarding the customer. The note will remain associated with the customer for any future reservations.
From the Customer Record
- Click Customers > Contacts and select a customer record.
- Under Customer Notes, select the Add Note button.
- Type in your note. When you are finished, click the Add button.
- The note will now appear under the Customer Notes drop-down in the Purchase Tab and on the Event Roster.
Note: The Customer Note will follow the customer and any future booking they make.

From the Purchases tab
- In the Purchases tab, navigate to the customer purchase.
- In the Notes section, click the +Add Note button next to Customer Note.
- In the pop-up, enter your note and then click the Add button.
- The note will now appear under the Customer Notes drop-down and on the Roster.
Updating Customer Note from Event Roster
- On the Dashboard, find the event and click on it. This will open the Event Roster.
- Find your customer in the guest section, click the arrow next to their name, then click on the note shown in the grid.
- In the pop-up, enter your note and then click the Add button.