The Xola Distribution Network allows you to partner with other companies (Operators) who use Xola to sell each other's experiences. You can choose to distribute as a single experience or as a package bundled with some of your experiences.
This platform enables you to expand your reach by connecting directly with fellow operators in your area or network, opening up new sales channels and creating collaborative offerings without the need for third-party resellers. Through the Distribution Network, you can form mutual partnerships where you list your products with other operators and, in turn, offer their products through your own checkout or back office. This can help you provide more value for your customers, fill more open slots, and tap into new audiences.
You have flexibility in how you structure these collaborations - whether it’s a single tour or activity, or a customized package that presents a seamless multivendor experience at checkout. All pricing, commissions, and booking terms can be managed through configurable templates, making it easy to set up the business relationship that works best for both sides. Operators can work together to create powerful cross-promotional campaigns, appealing bundled deals, or targeted solutions for large groups and tour operators. By leveraging the Xola Distribution Network, you enhance your product lineup and strengthen key partnerships - helping your business grow and deliver greater guest satisfaction.
User Access: Admin roles have access to set up and manage Operators in Xola.
Admin, Reservationist Lite or Reservationist roles can make and view Partner reservations in Xola.
Equipment Manager, Guide Manager or Guide roles can only view Partner reservations on the Roster.
Marketer roles can only view Operators in the Distribution Tab.
Admin or Accountant roles can view Partner reservations in Reporting.
To grant access to users, click here.
What's covered in this article:
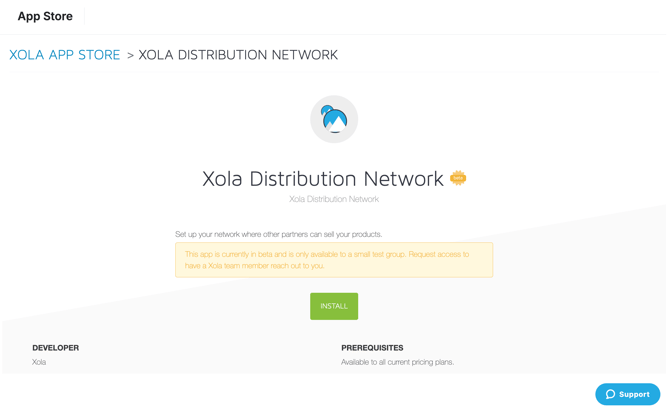
How to Enable Xola Distribution Network
- Navigate to the Xola App Store.
- Search Xola Distribution Network, and select the app tile.
- Click the green Install button shown in the screenshot below.
Note: If you need help in getting access to this feature, you can reach out to support@xola.com.
How to set up Operators
Setting up your Distribution Profile
- Navigate to Distribution > Distribution Profile and fill out the Business Details.
- About your business: Enter a brief summary about your business that will be displayed to other Operators who add you to their distribution network. It will not be displayed to customers.
- Distribution phone number: Enter a phone number where other Xola Operators can contact you.
- Distribution E-mail: Enter an email address where other Xola Operators can contact you.
- Profile Preview: Preview how your profile will be displayed for other Operators when they search for you in the distribution network.

-
- Next, you will need to create a terms template if you do not already have one created.
- Click on the blue Create Template.
- Please refer to this article to learn how to set up a terms template.
Adding an Operator
To add an Operator to your distribution network:
- Navigate to Distribution > Operators > Add an Operator.
- Search the Operator's name and then click on the result.
- Next, set up the Partnership:
- Partnership Settings: Toggle on the option:
- I want to sell their products: This will allow you to sell the operator you are connecting with products.
- I want them to sell my products: This will allow the operator you are connecting with to sell your products.
- Distribution Terms: Apply a terms template to the Operator, this will apply when the Operator sells your products.
- Partnership Settings: Toggle on the option:
Tip: If you do not want any commissions or discounts applied, you will need to create a terms template without commissions or discounts and apply that template here.
- Click Request Connection.
- This connection will remain pending until the other Operator accepts it.
- If you want to delete the request, click on the
 icon and click the red delete button at the bottom of the screen that pops up.

Accepting a Connection Request
If another Operator adds you to their distribution network, you can view your Operator Connection Requests by navigating to Distribution > Operators.
- Click the
 icon to accept the Operator request.
- Next, set up the Partnership:
- Partnership Settings: Toggle on the option:
- I want to sell their products: This will allow you to sell the operator you are connecting with products.
- I want them to sell my products: This will allow the operator you are connecting with to sell your products.
- Distribution Terms: Apply a terms template to the Operator, this will apply when the Operator sells your products.
- Partnership Settings: Toggle on the option:
- Next, set up the Partnership:
- Click the
 icon to decline the Operator request.
- This will send them a notification you declined the request.
Updating Operator Requests
If you need to update your Terms or Partnership settings after you have accepted a request, navigate to Distribution > Operators.
- Under the Action column, click on the
 icon.
icon. - Operator Profile: This shows you the Operator's profile and how you can contact them.
- My Terms: Manage the permission for the Operator to sell your products according to your terms.
- Adjust the terms template applied to the Operator and dictate which experiences any commissions/discounts are applied to.
- Operator Terms: Enable and select the Operator’s products you would like to resell according to their terms.

Removing an Operator
Once you remove an Operator from your distribution network, you will no longer be able to distribute their products, including any packages that have been configured containing this operator's products.
To remove an Operator:
- Navigate to Distribution > Operators.
- Under the Action column, click on the
 icon.
icon. - Click Remove.
How to set up Partner Packages
You can set up packages that include your experiences as well as your operators' for customers to purchase at checkout. To set up a partner package:
- Navigate to Products > Partner Packages.
- Click +Create Partner Package in blue at the top right corner.
- Enter the Partner Package Description details:
- Title: Enter a title for the package (this text is shown to the customer at checkout).
- Your Experiences: Choose the experiences from your company you want to sell in this package.
- Partner Experiences: Choose the experiences from your operator you want to sell in this package.
-
- Excerpt: Enter text that briefly describes the package for the customer. This text is shown to the customer at checkout.
- Description: Enter text that is only visible through distribution channels like Viator, Get Your Guide, etc. If you don't have integrations set up with distribution channels, you can copy and paste the content from the Excerpt section here.
- Duration between Events: if you would like to require a minimum time between events, you can enter the time frame here.
- Click Save.
- Next, set up your Partner Package Pricing.
Note: With partner packages, the terms you configure here will only apply to your products. Operator terms will apply to their products.
- Basic Terms: This option will allow you to configure a percentage based discount to your experience. You will also be able to choose whether you would like to include or exclude add-ons from that discount.
- Advanced Term: This option will allow you to configure a mixture of dollar and percentage-based discounts per demographic for your experience. You will also be able to configure these discounts to add-ons.
- Click Save.
- Next, you will need to upload a photo for each partner package you make. This photo will be displayed to customers at checkout when they make a partner package purchase. The primary photo for each experience is also displayed to customers; however, individual experience photos are displayed a bit less prominently than your Partner package’s primary photo.
How to Purchase Partner Experiences or Packages from the Back Office
- From the Dashboard or Purchases tab, click the green +Make a Purchase button.
- Choose the Partner Experience and Partner Package in the dropdown menu at the top right. This will display all your Operators you are connected with experiences and packages that you can sell.
- In the product selection section, click on the experience your customer wants to purchase.

- Enter Purchase Details.
- Quantity of guests
- Date & Time of the event
- Modify the purchase details if needed.
- Enter Customer Details
- Enter payment details.
- If you selected a Partner Package to purchase, you will fill out the details for all the experiences in the Partner Package.
If you need more details on the items above, please read this article.

After you make the purchase, this will not show in your Purchase Tab because it is a purchase for the Operator. The Operator will now see the purchase you made in their Xola account. If you make a Partner Package purchase, your experience with the Package will show in your Purchases tab.
How to See Partner Purchases
Once an Operator makes a purchase for your experience, it appears in the Purchases tab along with all other purchases. When you click on the purchase, it will display either a Partner Purchase or Partner Package icon in the title, and the Tags section will also include the name of the Operator who made the purchase.


How Reporting Works
Similar to Agents, the Distribution Partners Reconciliation Report will show you partner purchases that have been made from the Operators you are connected with. To access the report:
- Navigate to Reports > Distribution Partners.
- Click on the Operators Name to view the report.
- The reservations will appear along with additional terms details (commissions, partner deposit, etc).
Note: Only reservations that have occurred will populate in this report. Future reservations will not show on this report until they occur.

Tip: Operator purchases will also populate in the Custom Reservations Report under Reporting > Custom Report. You can use the Partner Name column filter to populate purchases by Operators.
