There are many instances where having a copy of your event roster can be invaluable—perhaps you need to share the guest list with your guides to prepare for an upcoming trip, or you want a digital copy emailed for record-keeping, safety planning, or end-of-day reporting.
Additionally, you may wish to analyze guest or reservation data captured on the roster for operational insights, marketing outreach, or post-event follow-ups. Xola makes it easy to tailor what data you include on each exported roster, ensuring you capture exactly the details you need for your workflow.
In this article, you’ll learn how to customize the roster export, effortlessly export it to a .CSV for analysis or sharing, email the roster directly to yourself, guides, or other team members, and print a hard copy—giving you ultimate flexibility in managing, distributing, and using your rosters for any operational scenario.
User Access: Administrator or Guide Manager roles have access to Roster Preferences under Settings to set up and can Print, Email, and Export the Roster.
Guide, Equipment Manager, Reservationist or Reservationist Lite roles can only Print and Export the Roster.
To grant access to users, click here.
What's covered in this article:
Customize the Roster Export
Xola allows you to customize what is included in your roster export from the Settings tab. Simply go to Settings > Preferences > Rosters and select which columns to include in your exports.

Export a Roster
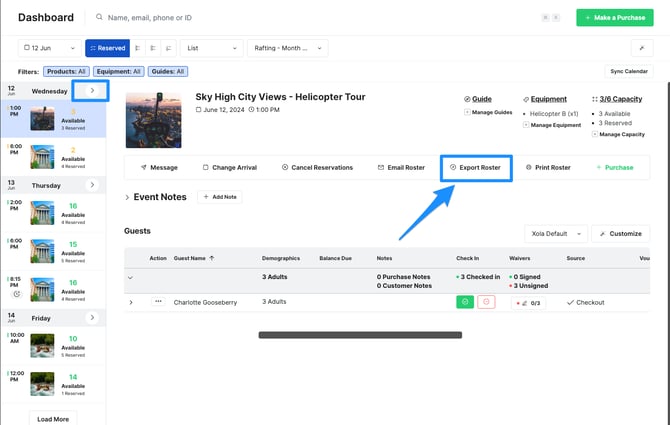
To export the roster for a particular event, click the Export Roster button from inside your Dashboard in the ![]() icon or Roster View. It will immediately generate a .csv file of the roster that will download directly to your browser.
icon or Roster View. It will immediately generate a .csv file of the roster that will download directly to your browser.
To export a whole day's roster from the List View or Week View, hit the ![]() icon and click Export Day's Roster.
icon and click Export Day's Roster.

Tip: If you're currently in a time slot and viewing the Roster, to get back to the overall List View hit the arrow button next to the date name.
After clicking the Export Roster button from inside the Roster View, the roster will immediately be generated as a .csv file that you can download directly to your browser.
When opened you will see the following tabs on the excel sheet, if the information is on the roster.
![]()
- Summary: This combines the details of all the reservations on the roster. Information will include the following (if on the roster): Event capacity, Total booked, Waivers signed, Event Notes, Guides, Equipment used, Total Add-ons, and Total Weight.
- Roster: This tab displays information for each reservation individually. It shows the details of each reservation on the roster. Information will include the following (if on the roster): Name, Email, Phone, Demographics, Demographics Total, Waivers, Payment Status, Purchase Notes, Coupon, Checked, Add-ons, and Questionnaire.
- Waivers: This tab will show the waiver information for each reservation if you are using waivers. Information will include the following (if on the roster): Name and Email.
Email a Roster
To email the roster for a particular event, click the Email Roster button from inside your Dashboard from the ![]() icon or Roster View. It will immediately email the roster to the Communication email you have designated in Xola account or to the guide assigned to the trip.
icon or Roster View. It will immediately email the roster to the Communication email you have designated in Xola account or to the guide assigned to the trip.

Note: The roster for a tour is automatically emailed to the assigned guide(s) 24 hours prior to the event. Click the Download spreadsheet link in the top right corner of the email to download the Excel version of the roster.
Print a Roster
To print the roster for a particular trip, click the Print Roster button inside your Dashboard from the ![]() icon or Roster View.
icon or Roster View.
