With the Agent user grant access, you can log into a Xola account, make back-office purchases, manage reservations made by yourself and your team, and view your commissions report. This level of access empowers agents to independently handle reservations, process payments, update customer information, and efficiently manage their sales pipeline from within Xola—without relying on admin intervention for every transaction.
A Xola account admin must toggle on Allowing agent user login under either an existing or a new Agent, providing a secure way to delegate responsibilities while keeping sensitive admin controls protected. Agent users benefit from individualized login credentials and personalized dashboards, allowing them to view only the purchases, commissions, and reports relevant to their own activity—or, in the case of Parent Agents, their associated Child Agents as well.
Robust permission controls and audit trails ensure all agent actions are tracked, supporting both accountability and transparency across your referral and channel partner network. This setup streamlines agency relationships, reinforces data security, and elevates your overall sales operation.
To learn more about how a Xola Admin sets up a new Agent, please click here.
Terms to know:
- Parent Agent: The main organization, such as a hotel or tour operator group. Parent Agents can oversee multiple child agents, aggregate reporting, and view all purchases and commissions from their network.
- Child Agent: Any Agent operating under the umbrella of a Parent Agent, such as individual concierges, front-desk staff, or sales representatives within a larger organization. Child Agents have access limited to their personal sales, purchases, and commission records, ensuring clarity and simplicity for every team member.
User Access: Administrator or Marketer roles have access to set up Agent Users in Xola.
To grant access to users, click here.
What's covered in this article:
- Logging in as an Agent User
- How to make a purchase
- Purchases Tab
- Reporting Tab
- Distribution Tab
- Settings Tab
Logging in as an Agent User
When you are allowed login access for a Xola account, you will be sent an email to verify the email address and set up a password. Once this is done, you will be able to log into Xola here.
When you sign in for the first time, you must agree to Xola's Terms and Conditions and Privacy Policy.

How to make a purchase
- From the Purchases tab, click the green purchase button and choose an experience to purchase.
- Next, you'll be directed to the Product Details page, where you can enter the following:
- Privacy Settings: Choose whether the reservation is private or shared, if it is an experience with shared and private options. If you do not have this option, the reservation will default to its privacy settings.
- Guest Quantity: Choose the number of guests attending the experience. If you have different demographic types, you can enter the number for each demographic.
- Date and Time: Choose the date and time in which the guests are coming for the experience.

Purchase Modifications
After you have filled out the product details, you can choose to modify the purchase by selecting:
- Add-ons: Choose which add-ons you would like to add to the reservation if the company have add-ons set up.
- Custom Line Items: Toggle on and click +Add Line Item; you can create on-the-fly discounts or charges, which can be taxed if needed.
- Codes: Add a coupon by locating the code field under the purchase summary on the right. Click on the dropdown or enter the code you would like to use. Select the code you would like to use and click Apply.

Customer Details
Now you can enter the Organizer Details:
- Customer Name
- Customer Email
- Customer Phone
- Organizer is attending:
- Toggled on: This means the organizer is attending, and the main attendee in the section below will default to the organizer's name.
- Toggled off: This means the organizer is not attending. In the next section, you'll need to fill out the name of the main attendee so that your staff knows who will be attending the experience.
After this, you can fill out the Attendee Info:
The attendee info section will help the staff know who is coming for the experience. Here you can:
- Fill out the name of each guest attending
- If the company uses the Xola waiver feature, as guests fill out the waivers, the names will automatically populate into this section on the Purchases Tab.
- The questionnaire answers if the company is using this feature.
- If it is a per-person questionnaire, you can click on the
 icon next to each guest and fill out the questionnaire for each attendee.
 - If it is per reservation, click the icon next to the main attendee and complete the questionnaire.
- If it is a per-person questionnaire, you can click on the
- If you want to skip this, you can toggle on Ignore questionnaire validation errors for now.

Payment Details
Next, choose your payment workflow:
- Now: Take immediate payment by Credit Card
- Deposit:
-
Enter Deposit Details
-
Enter Credit Card Details
-
Deposit Amount: The amount to be collected right now.
-
Balance: Use the dropdown menu next to days to designate how many days out from the experience when the rest of the purchase total is due, or you can use the date dropdown to pick an actual date.
-
-

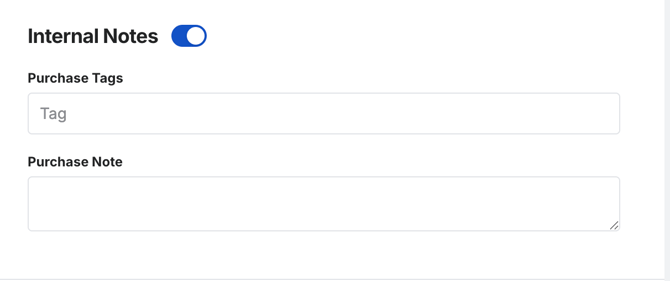
Internal Notes
Optionally add a Tag or internal note for the staff.
- Tag: A tag is a word or phrase added to a purchase that can be used for searching and filtering in the Purchases tab. When you type the tag into the search bar, it will bring up all purchases that have been tagged as such.
- Purchase Note: This will appear on the event's roster.
Add Another Product
If you need to add another experience to the same purchase, you can select the Add Another Product button.
To complete the purchase, click Pay.
Purchases Tab
Under the Purchases tab, the Parent Agent will see all their purchases and any Child Agent purchases under their umbrella. Child Agents will only see their purchases.
The scroll bar
The scroll bar appears to the left of the screen in your Purchases tab and is a scrollable library of all the customer purchases.
It is sorted by the most recent purchases, so your newest purchases are always located at the top. From the scroll tab, you’ll see the customer name, tickets or equipment purchases, the dollar amount of the purchases, and the date of their experience.
If you click on the purchase from the scroll tab, it will bring up the entire purchase on the right.

Searching for Purchases
Your purchases are searchable by customer name, email, phone, or tag.
You also have an Advanced Search filter to the right of the search bar that you can click on, and more filtering will become available. Here you can filter your search by:
- Purchase Date or Arrival Date
- Various date ranges
- Type of Product (Experiences, Gifts, Store Credits, Packages, Partner Packages, etc.)
- Product Name
- Reservation status (Confirmed, Pending, or Cancelled)
- Balance (Paid in full, Balance due, or Refund Due)
- Dispute status
- Source of purchase
- Agents

Modify Purchases
Under the search bar, you will see the name of the product purchased, the date and time of arrival, and the confirmation ID.
Note: If you see a lock icon with the customer's name ![]() this means they reserved a private event.
this means they reserved a private event.
Under this, you will see the modification bar. Here, you can make many modifications to this customer's reservation. If you would like to learn more about all the modifications you can make to your customers' reservations from the Purchases Tab, please click here.

Purchase Details
Under the Modification Bar, you will see the purchase details. Here you can view:
Reservation Status:
- Green: Confirmed
- Yellow: Pending
- Red: Canceled
Payment Summary:
- See how much the customer paid and whether discounts or fees were applied.
- By clicking the Modify button in this section, you can also modify the taxes and fees, any codes on the reservation, and the guest count, and add a custom charge or discount.
- Add a code to a reservation by clicking on the Apply Code button.
- If there is a Balance Due, then you will see a button below on the payment summary to prompt the appropriate workflow for you to take.
Contact Information:
- The contact information of the main organizer of the purchase will be shown in this section.
- Message the organizer by hitting the message icon
 next to their information.
Attendees Section:
This section will be displayed for all reservations. If the company has per-person questionnaires or waivers enabled in Xola, the names of each guest will appear here when the customer or you complete those items. If they do not utilize these features, only the main attendee or organizer will be listed, followed by the demographic details. Additionally, you have the option to manually enter guest names if desired.
In the Attendees Section, you can:
- Questionnaire:
- To see or edit questionnaire answers, click on the paper icon
 with the colored dot next to it > Edit or add the information > click Save.
- To see or edit questionnaire answers, click on the paper icon
- Waivers:
- To manually link waivers, click on the pencil icon
 with the colored dot next to it > In the left column of the 'Link a Waiver' window, select the waiver you would like to link > Save. These waivers will appear, and the name on the waiver will appear in the attendees' section.
 - To view the waiver, click the pencil icon with the colored dot next to it > hit the down arrow button. This will download the signed waiver to another screen for you to view.
- To unlink the waiver, click the pencil icon with the colored dot next to it> hit the broken link icon. This will unlink the waiver and allow you to link another one. The guest's name will also be removed from the attendees section.
- To manually link waivers, click on the pencil icon
- Action Items:
- If the attendee is the main attendee and has a flag icon
 next to the name, you can take the following action by clicking the 3 dots
  :
:
- Copy Email
- Message
- Change Demographic
- Resend Confirmation Email
- Rebook customer
- Remove Guest
- If the attendee is not the main attendee, you can take the following actions by clicking the 3 dots :
- Change Demographic
- Remove Guest
- If the attendee is the main attendee and has a flag icon
Tip: If there are more than five attendees in the reservation, click the Show All button to expand the attendees section and view all names. By default, Xola displays only the first five attendees.

Tags:
- Navigate to the Purchases tab and search for the customer's purchase.
- In the Add tag field, type in your tag.
- Hit your keyboard's Enter key to finish tagging.

Notes:
Below the Purchase Details and Payment Summary, you will see the Notes section. In this section, you can see any notes:
- Event Notes: Event notes are for the event as a whole.
- Purchase Notes: Purchase notes are for this particular purchase.
- Customer Notes: Customer Notes are for a particular customer.

The Timeline:
The Timeline is a history of every transaction and modification made to a purchase. It gives you complete transparency into all the changes made to customer purchases, from the initial point of sale to the post-trip!
Transactions (charges and refunds) and modifications (arrival, guest count, add-ons, experience swaps) are recorded in the Timeline. Each record contains a timestamp and the name of the Xola user who made the change, making it easy to know who did what and when.
To filter the timeline only by Communications sent, toggle off Reservation Events and vice versa.
The Email and/or SMS will appear in the message chain below.
- Customers' responses to emails will pass through Xola and be added to the message chain.
- Customer responses to text messages will not appear for you in Xola.

Reporting Tab
Distribution Partner Report
You can see what the general state of affairs is:
- Go to Reports > Distribution Partner.
- Select the Date Range you want to see.
- Here you will see any Balance that is due.
- If you click on your name, you can see a detailed report of the transaction, voucher number, Net, Commissions, Deposits, and Commissions Due. You can also click on the transactions, which will take you back to the Purchases Tab for that transaction.

Note: Child Agents can only track their purchases in reports, while Parents can see all Child Agent reporting information as well.
Distribution Tab
In Xola, in the Distribution Tab, the Parent Agent can see some hierarchical relationships; we refer to these as Parent and Child Agents. A Parent Agent is the umbrella organization that hosts multiple individual Agents or Child Agents within it.
The Distribution Tab is where you can see the Agent name, Code, Discount, and Commissions set. You can also edit your Agent information by clicking the pencil icon under the Actions column.

Settings Tab
My Profile
- Basic Information
- This is where you can edit or change your basic information, such as your name, email, or phone number, in your account.
- Password
- This is where you can change the password to log into your Xola account.
Hardware
- Set up new payment devices.
- Pair or unpair already existing hardware devices.